How to Deploy an Application in SCCM [Step-by-Step Guide]
Learn to deploy an application in your server
4 min. read
Updated on
Read the affiliate disclosure page to find out how can you help Windows Report effortlessly and without spending any money. Read more
Key notes
- Deploying an application will help keep all connected devices in sync with the latest version.
- You can use different Control Managers, we have shown the steps for SCCM.
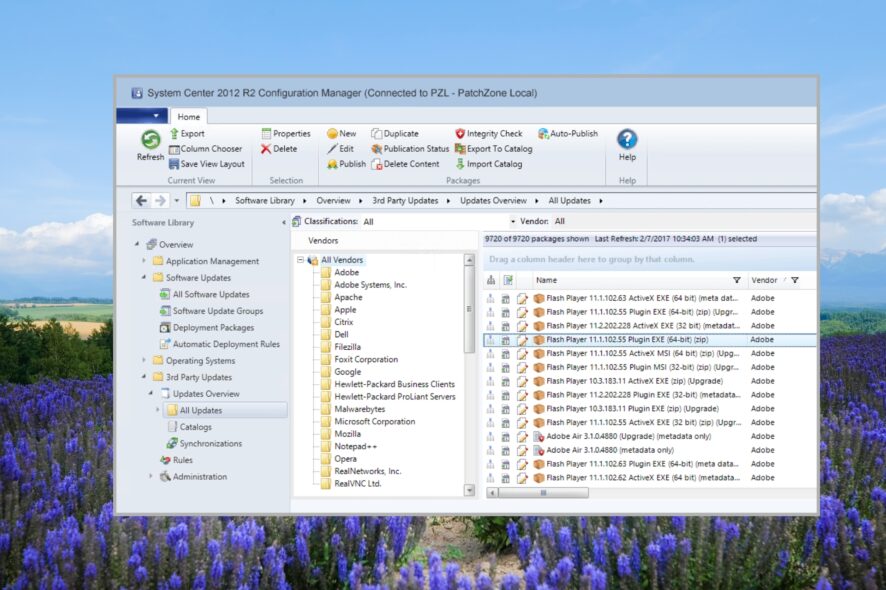
Using SCCM or System Center Configuration Manager, you can deploy software to desktops, laptops, servers, and mobiles over a vast network. This helps in keeping all connected devices in synch with the latest software and updates.
In this guide, we will give you a detailed, step-by-step guide on deploying an application in SCCM. Learning this, you will be able to distribute apps to client devices in the network. Let us get right into it.
What is SCCM?
SCCM lets you deploy different Microsoft and other third-party applications to client machines connected to the network.
The main work of the SCCM, besides deploying applications, is to manage their respective licenses, create packages, and respond to end-user requests.
When some changes are done to an application, a new revision of the app package is created. You can deploy them to the client machines using SCCM and recover the previous versions later.
Deploying applications in SCCM involves a few of the below elements:
- Application information – Provides a general overview of the application, such as the name, description, version, owner, and admin categories.
- Application catalog – Gives you information on how the application is displayed when the client views it in the Application Catalog.
- Deployment types – Contains the information required to install the application or software in the client machine.
- Windows Installer – Helps populate various fields of the Create Deployment Type Wizard using the Windows Installer file.
- Microsoft Application Virtualization – Helps detect application information and deployment types from the Microsoft Application Virtualization 4 manifest (.xml) file.
- Windows Mobile Cabinet – Generates a deployment type from a Windows Mobile Cabinet (CAB) file.
Let us now take a look at how you can deploy an application in SCCM.
How to deploy an application in SCCM?
- Download any application and place the setup file inside the software folder.
- Launch the SCCM console.
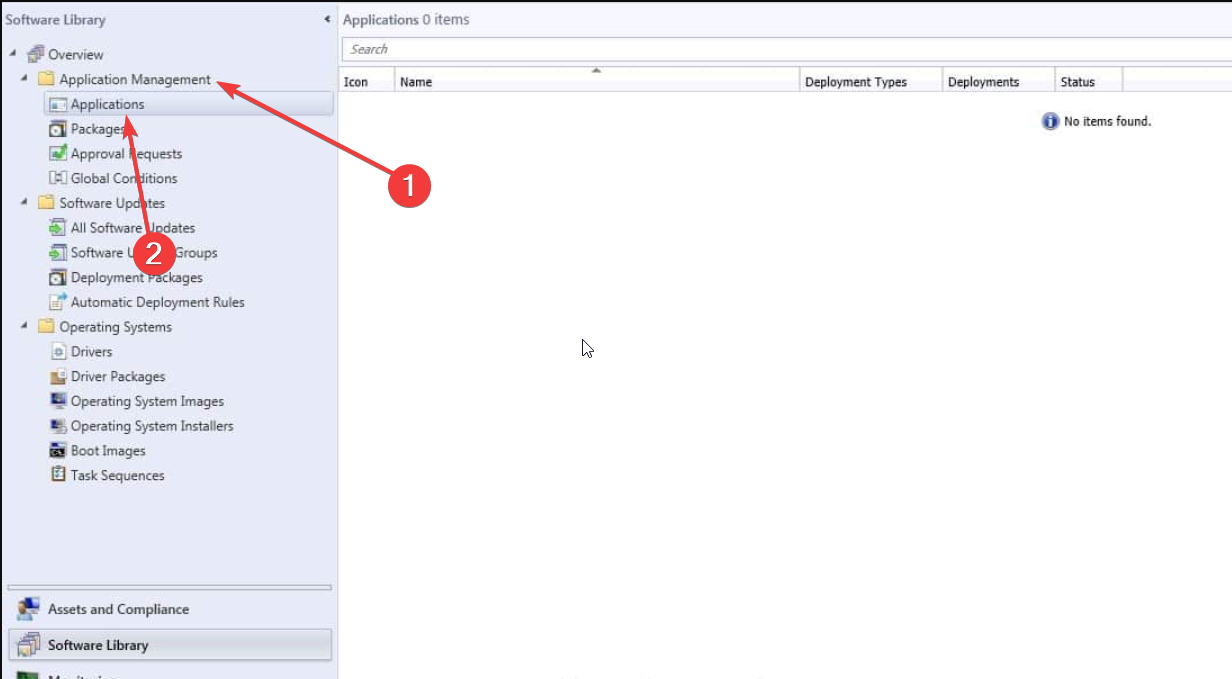
- Select Software Library.
- Expand Application Manager and select Applications.
- Right-click on Applications and choose Create Application.
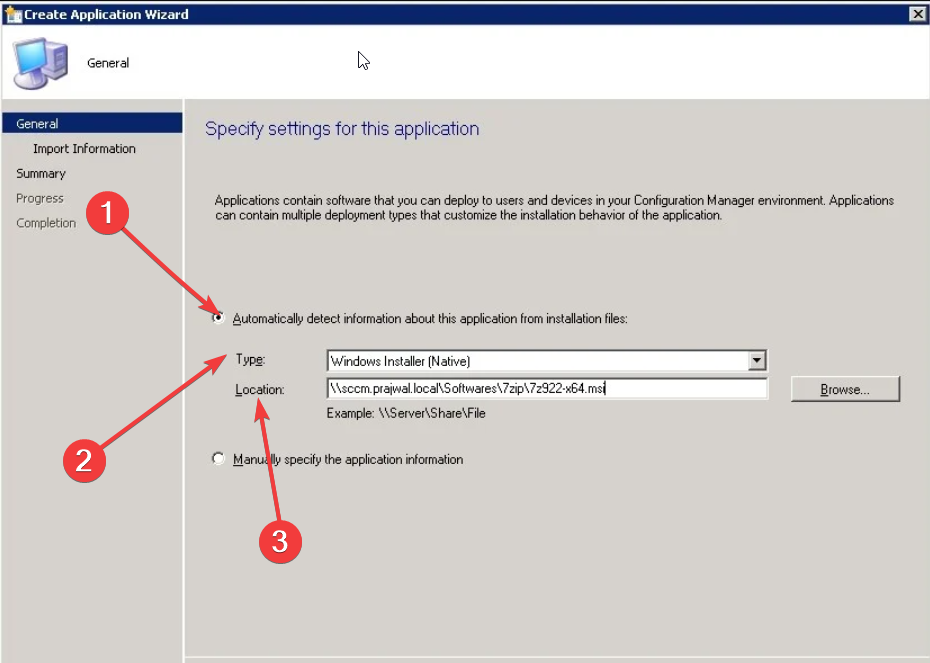
- Choose Automatically detect information about this application from the installation file option and choose the Type as Windows Installer (Native) and select the location of the file.
- Hit the Next button.
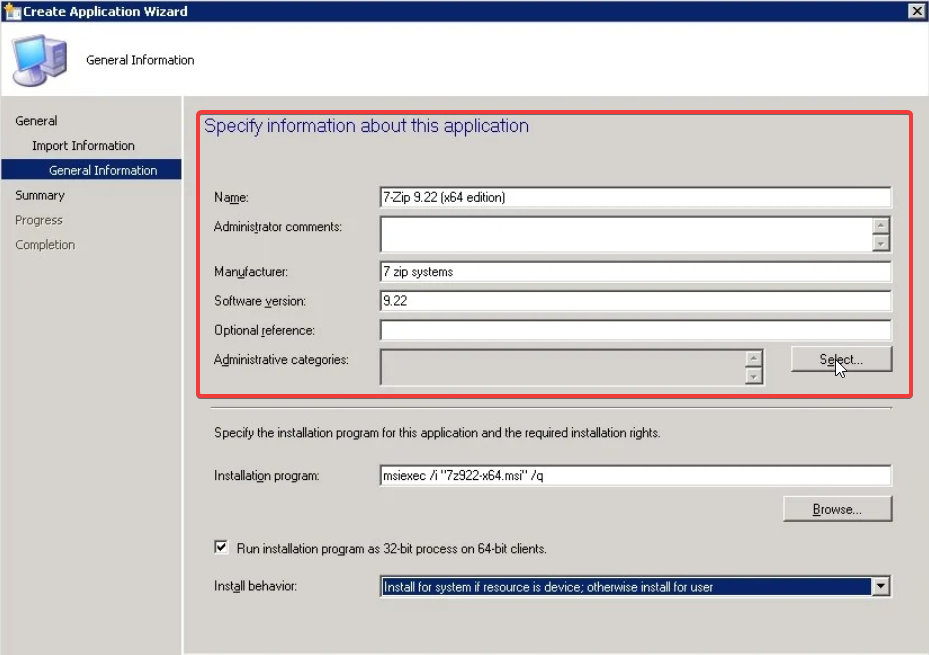
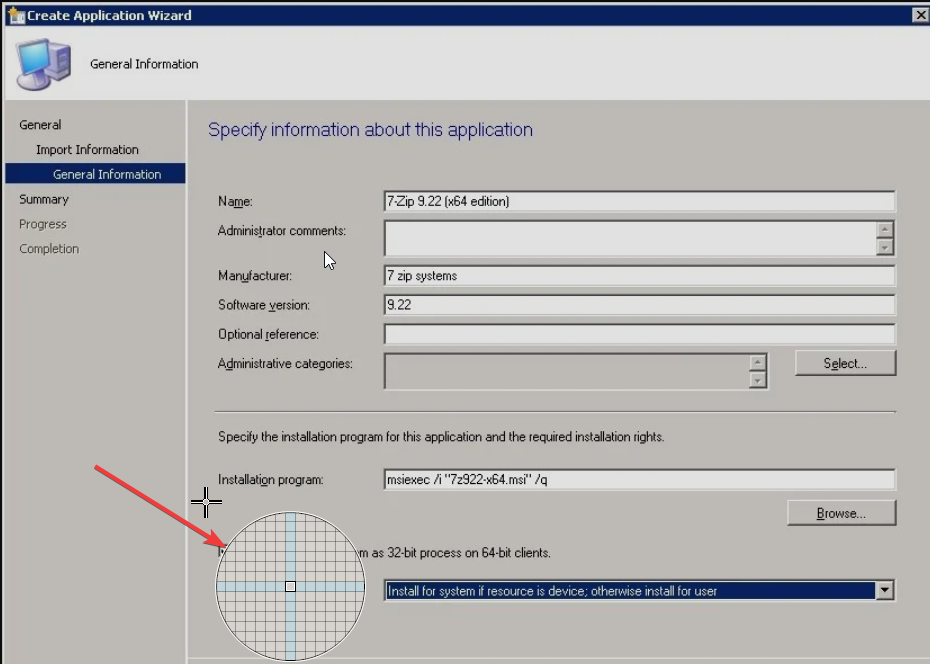
- Specify some details of the software.
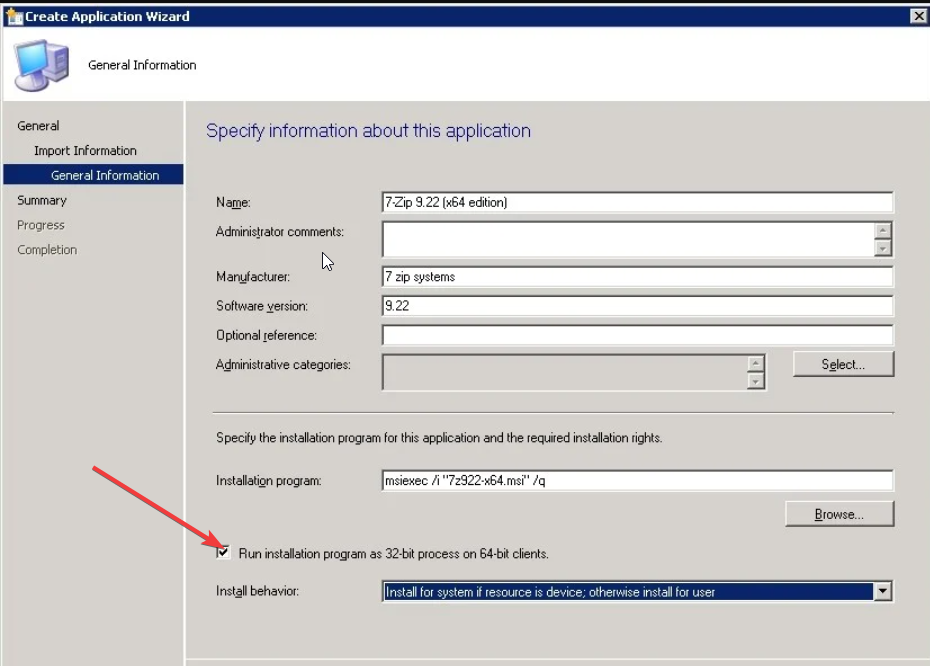
- Check the box for Run installation program as 32-bit process on 64-bit clients.
- For the Install behavior drop-down, select Install for system if resource is device; otherwise install for user.
- Select Next to proceed.
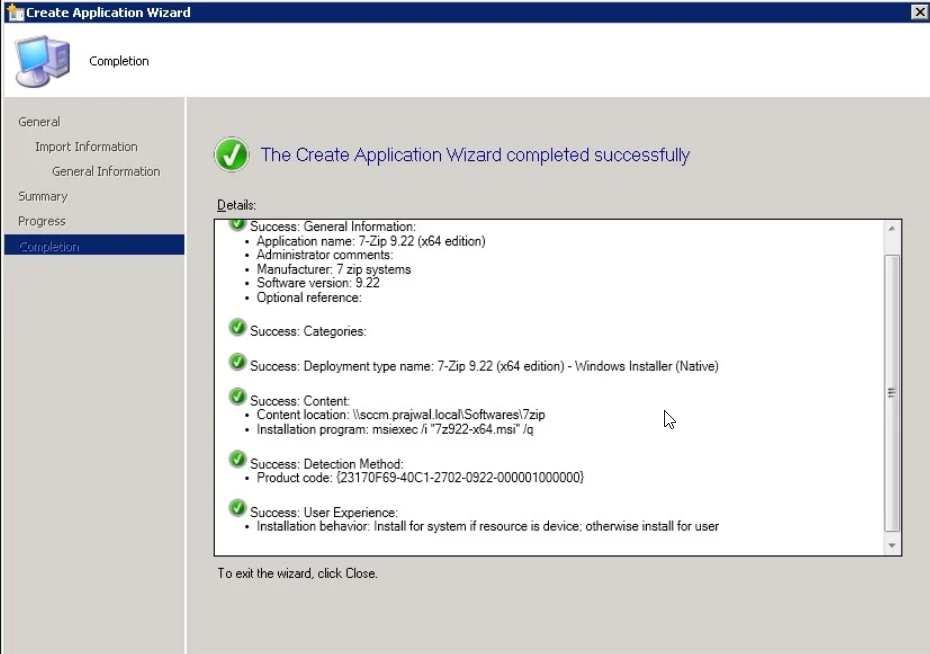
- Confirm the software information and click on Next.
- The Application will be created, and after cross-checking click Close.
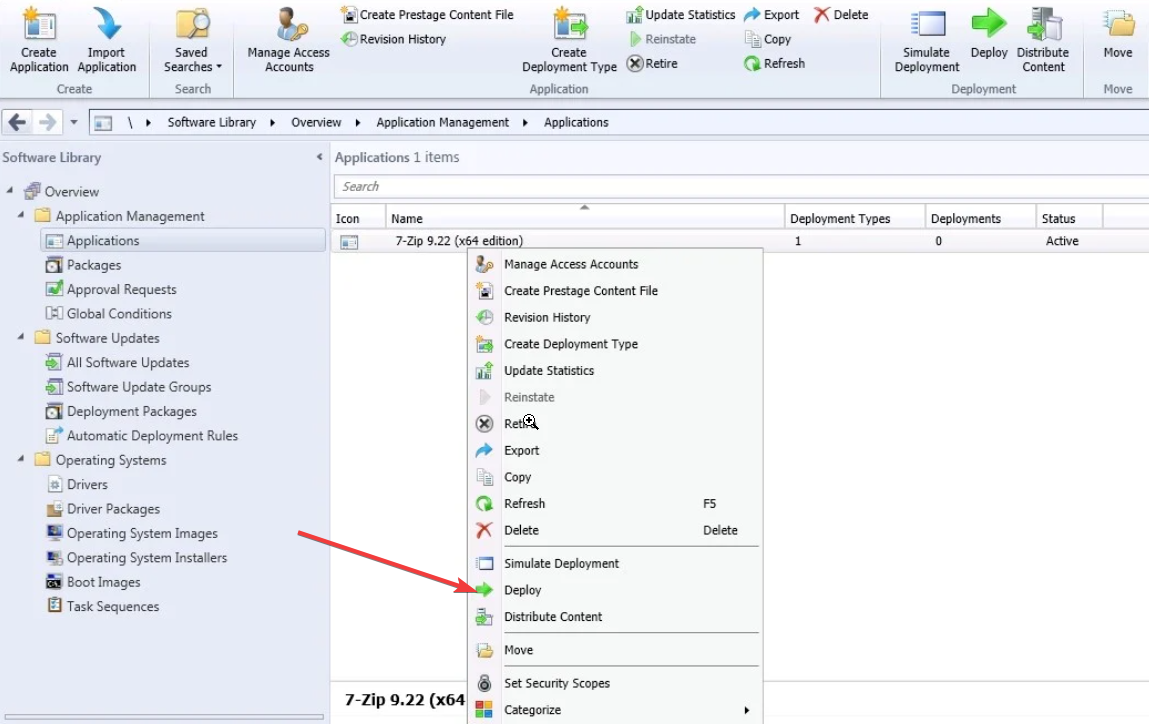
- The created application will now be visible under the Applications Management section inside the Application.
- Since we haven’t deployed it yet, you will see Deployments as 0. Once the deployment begins, you will see the count go up.
- Right-click on the application that you have created and select Deploy.
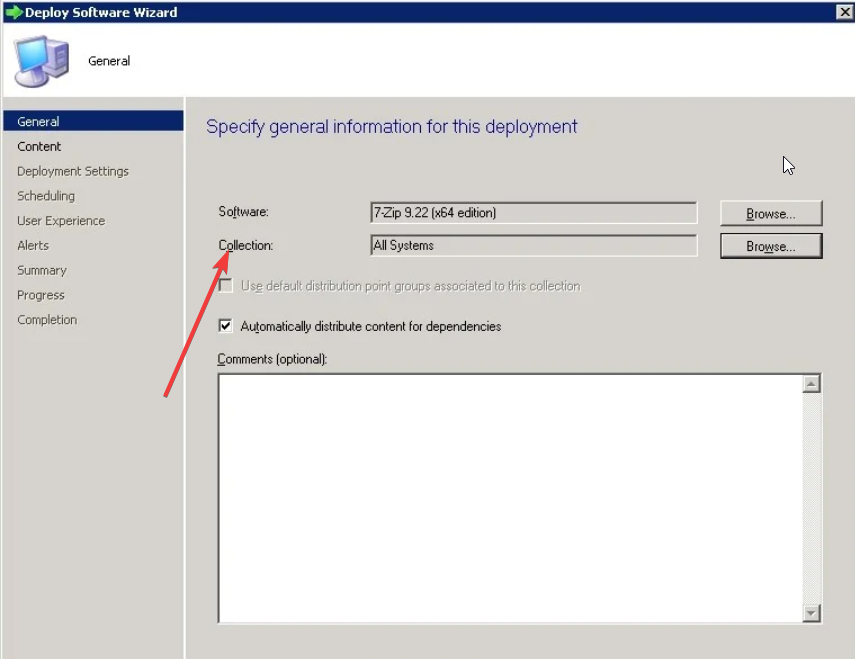
- Click on Browse and for the Collection drop-down, select All Systems.
- Click Next.
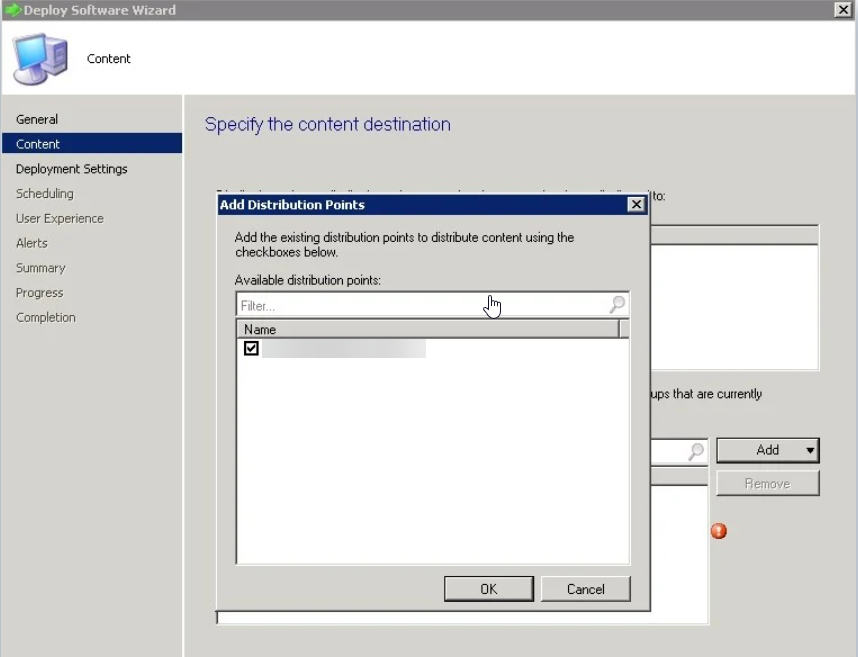
- To add Distribution Points, click on Add and add the points.
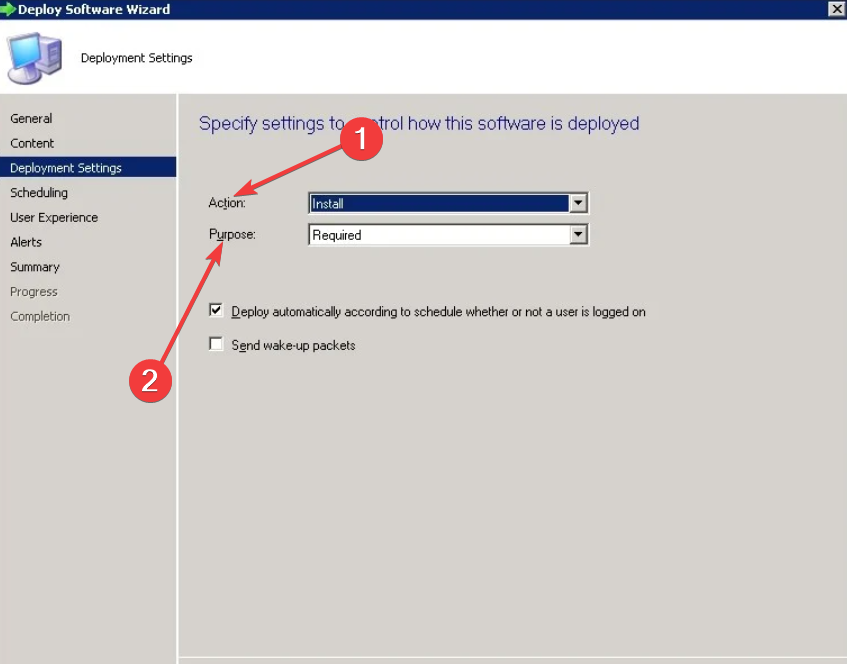
- On the next page, choose Action as Install and Purpose as Required.
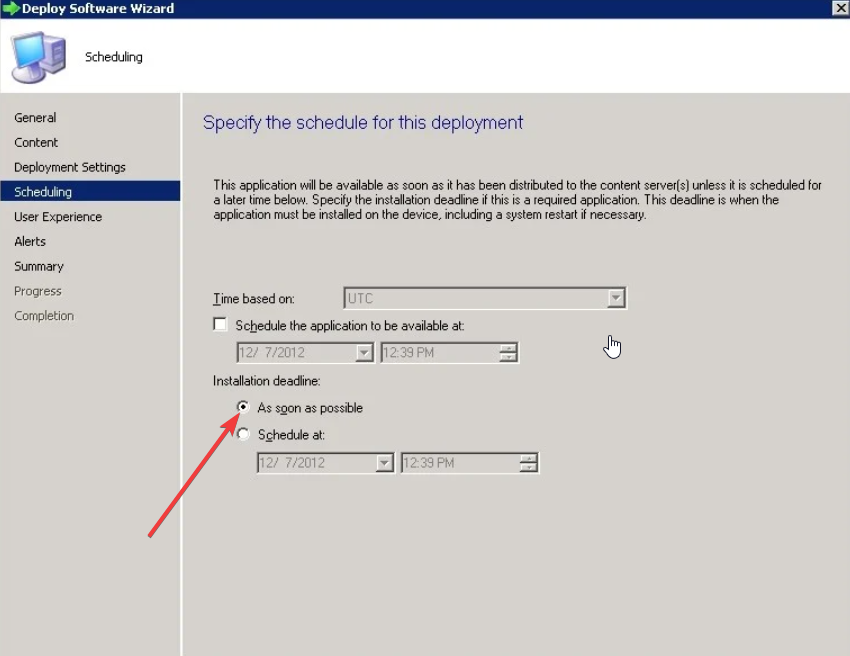
- You can choose to specify the deployment time else distribute the content to the content servers by hitting the As soon as possible option.
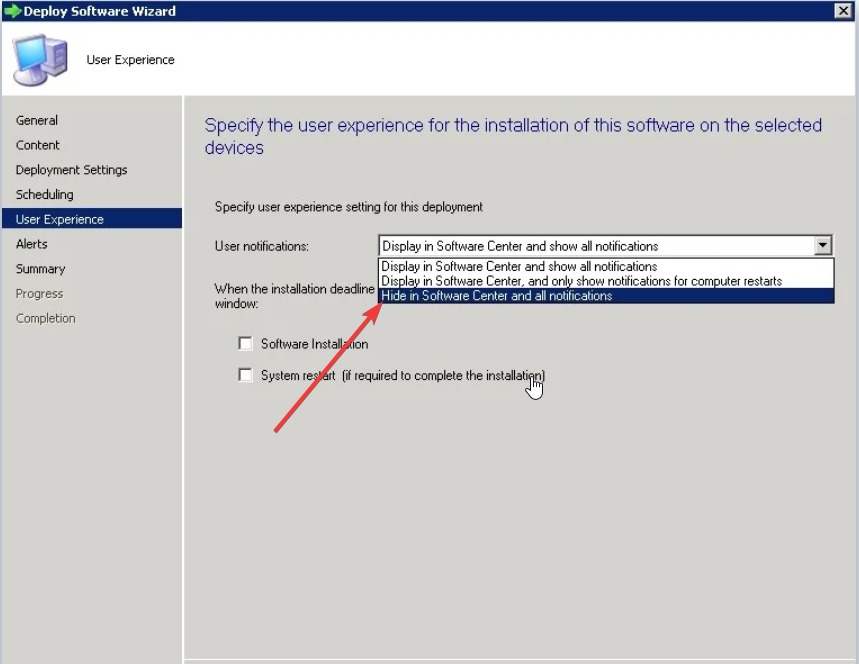
- For the User notification drop-down, select Hide in Software Center and all notifications and click Next.
- Keep everything as it is on the next page and click Next twice.
- Once the process is complete, hit the Close button.
- After you have deployed the application, you will see 1 under the Deployment section in the SCCM manager.
The above steps will help you with your query on how to deploy an application in SCCM. You need to follow each step individually because skipping any of them will not let you accomplish the process.
You can head to the Monitoring section in the Admin console and select Deployments. Here you will be able to view the current status of each Deployment and also see successes and failures.
That is it from us in this guide. You can refer to the solutions in our detailed guide that will help you resolve the Account has been disabled. Please see your administrator error.
Feel free to drop a comment below if the above steps helped with your query on how to deploy an application in SCCM.

