How to Fix a Windows 11 BSOD [Complete Guide]
Discover complete solutions from our experts to fix Windows 11 BSODs
8 min. read
Updated on
Read the affiliate disclosure page to find out how can you help Windows Report effortlessly and without spending any money. Read more
Key notes
- To fix a blue screen on Windows 11, make sure that you remove any third-party applications that may have caused it.
- Also, inspect your hardware since it is one of the most common causes of blue screens.
- As a last resort, you may need to reset your computer or reinstall Windows to fix Windows 11 BSOD issues.
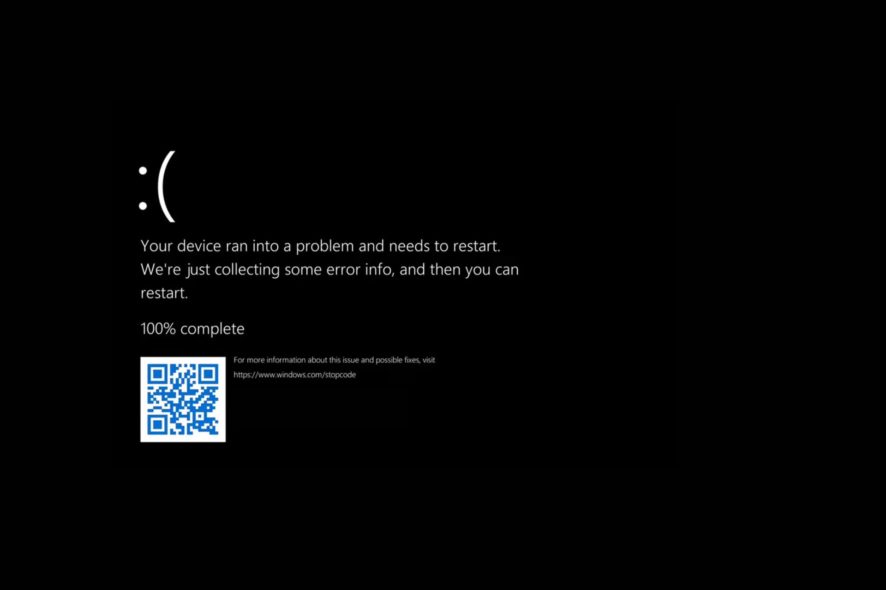
Windows 11 has been out for a while, and it’s a great operating system, but every OS has its share of issues. While errors are prone to happen sooner or later, certain problems can be more serious. In this case, we’re referring to BSOD errors.
What are BSOD errors, and how can you fix them on your PC? Join us while we take a closer look and show you all the methods you can use to fix them. Use Microsoft’s BSOD troubleshooter to find a selection of effective solutions.
Why am I getting a Windows 11 BSOD?
BSOD stands for Blue Screen of Death and appears when your PC reaches a fatal system error. If this happens, your system will crash to prevent damage.
The following are the most common causes; however, check out our article on what can cause a BSOD for more information:
- Hardware malfunction – A fault in the hardware might be brought on by components that are improperly connected to the motherboard, an abrupt disconnection brought on by a loss of power, or a damaged component.
- Corrupted system files – Because DLL files contain the system’s instruction manual, the functionality of your personal computer may be negatively impacted if even one of these files becomes damaged.
- Third-party applications – You may test to see if the problem is caused by a piece of software by uninstalling it briefly and then reinstalling it when you have established that your device is once again functioning normally.
- A faulty Windows update – Following the installation of a certain update on your device, you may find that you see a blue screen problem. In this case, you will have to uninstall the latest Windows update.
- Outdated drivers – Driver problems are another typical contributor to the dreaded Blue Screen of Death. Although outdated drivers may not directly contribute to BSOD errors, the interactions that these drivers have with your operating system do.
There are multiple scenarios in which a Windows 11 blue screen can happen, such as after an update, on startup, when idle, or even while gaming. Nonetheless, follow along to find out how to fix BSOD errors in Windows 11.
How can I fix a blue screen in Windows 11?
Before beginning the troubleshooting process, make sure to follow these steps:
- Remove any external storage devices, docks, and other unnecessary hardware, then reboot your PC.
- Inspect your hardware, especially your RAM, if you get a memory management Windows 11 blue screen.
1. Use BSOD fixers
If you want to fix the Windows 11 BSOD you have encountered faster than usual, you should use a specialized Blue Screen of Death software that will fix the error for you.
2. Uninstall third-party applications in Safe Mode
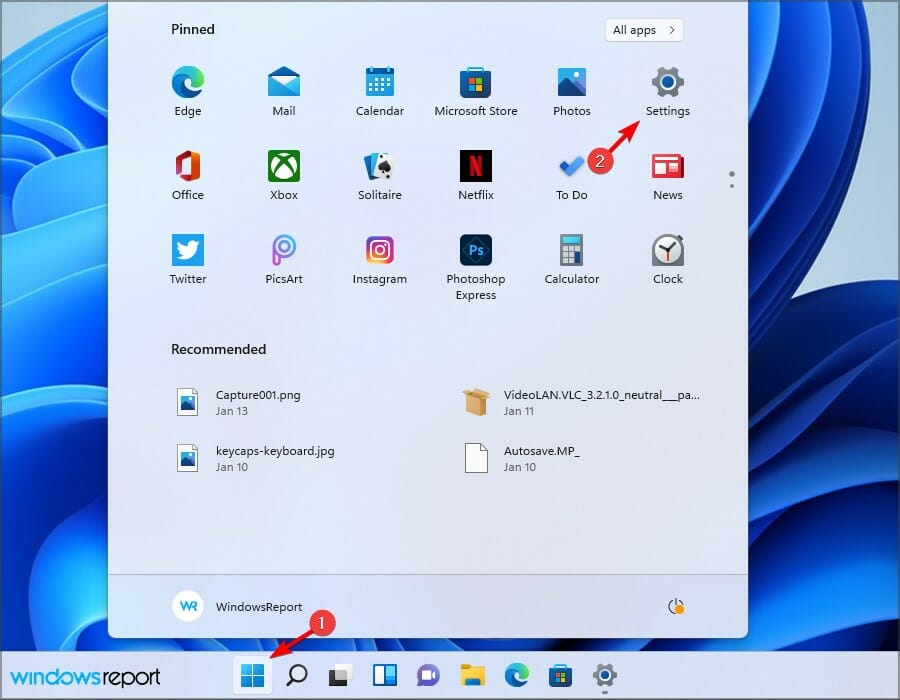
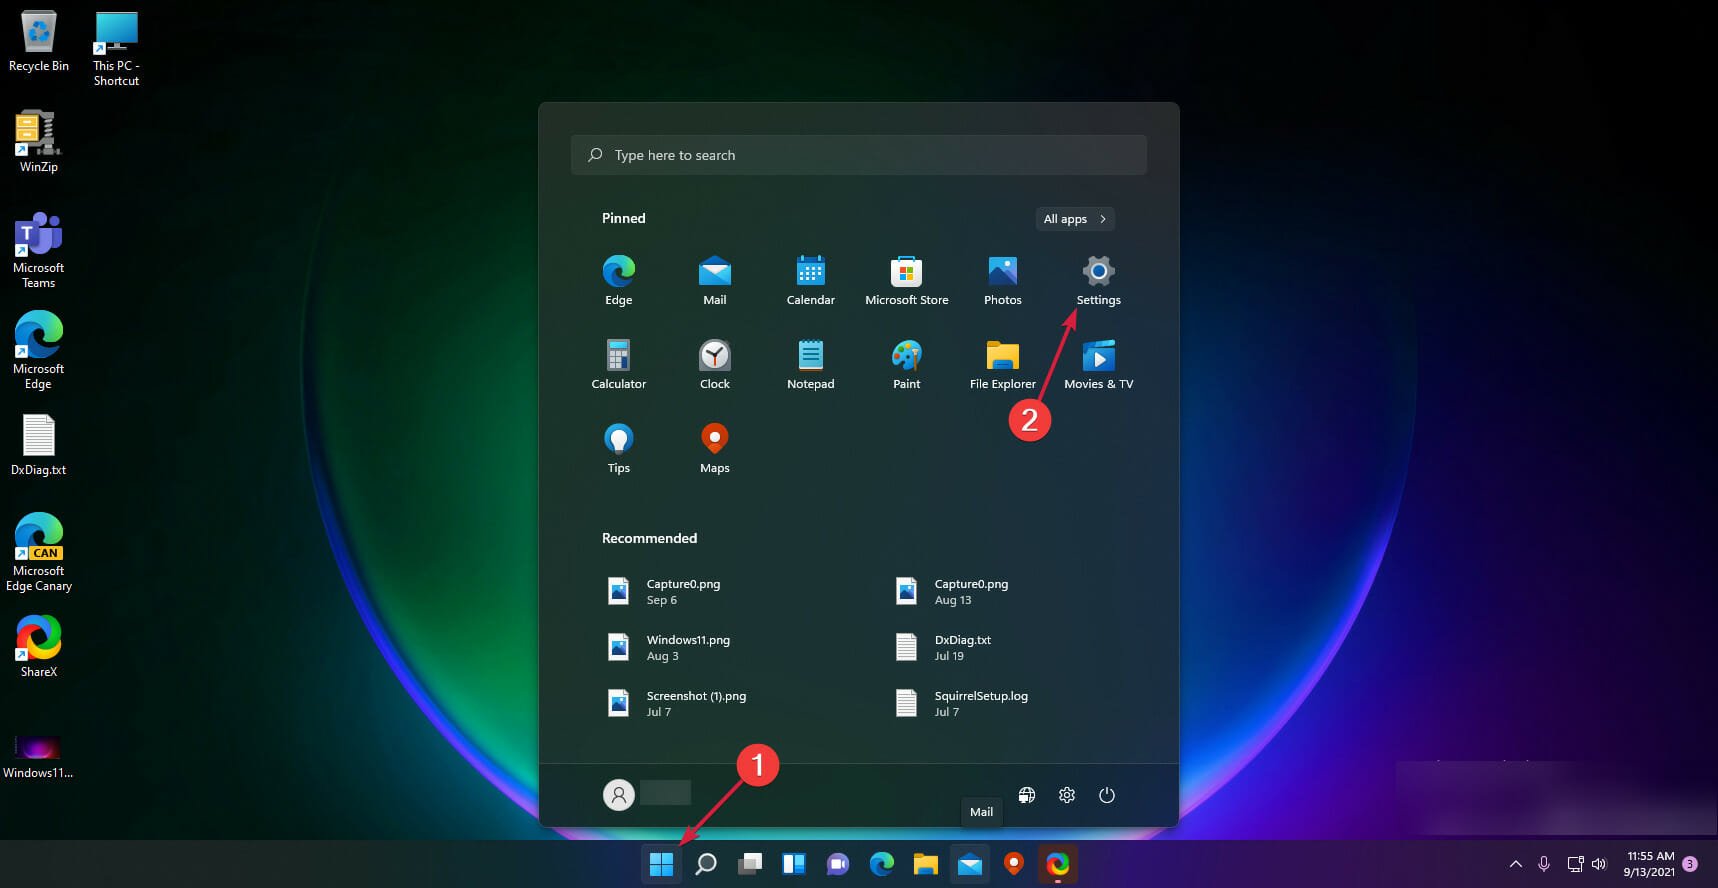
1. Click the Start icon from your Taskbar and open Settings.
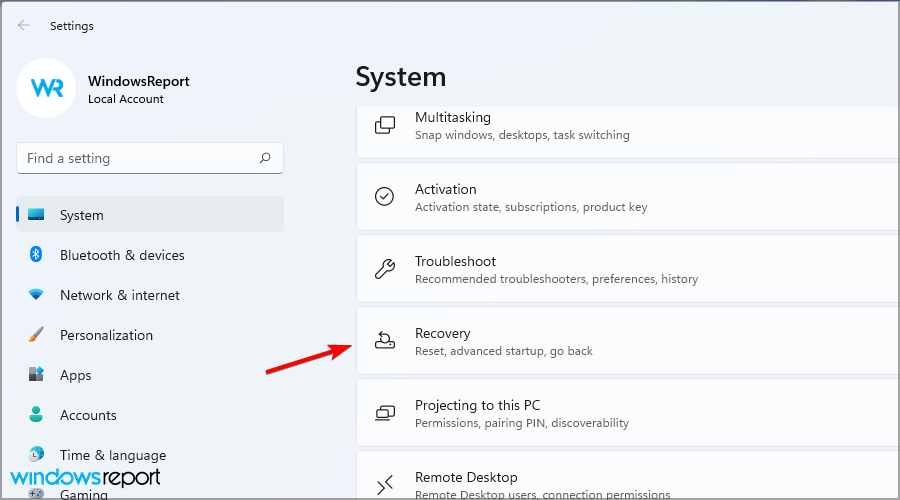
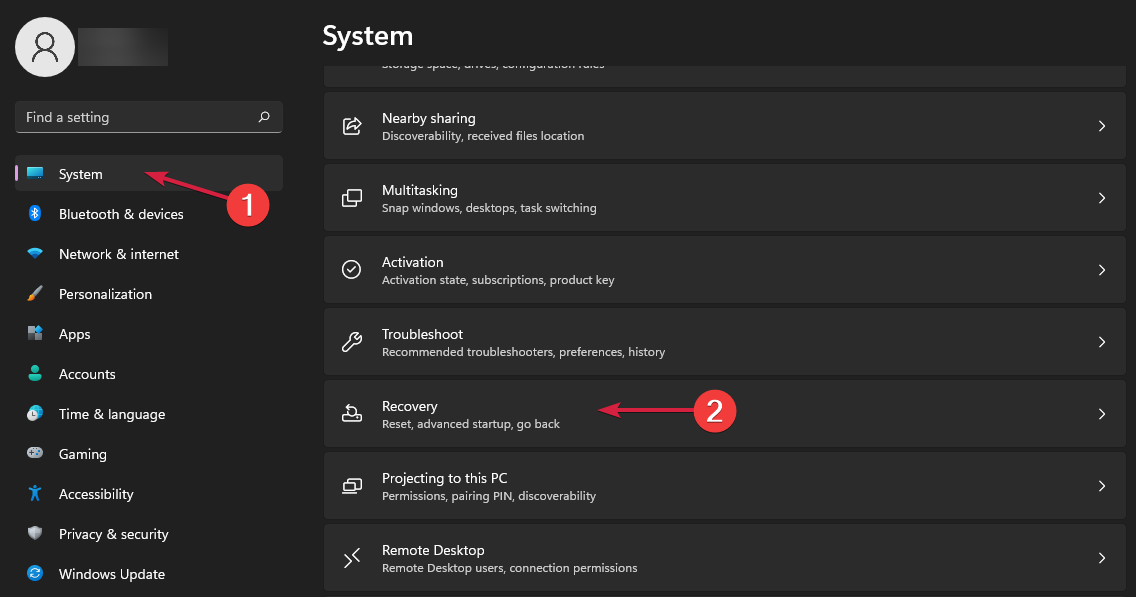
2. Click on System, then select Recovery.
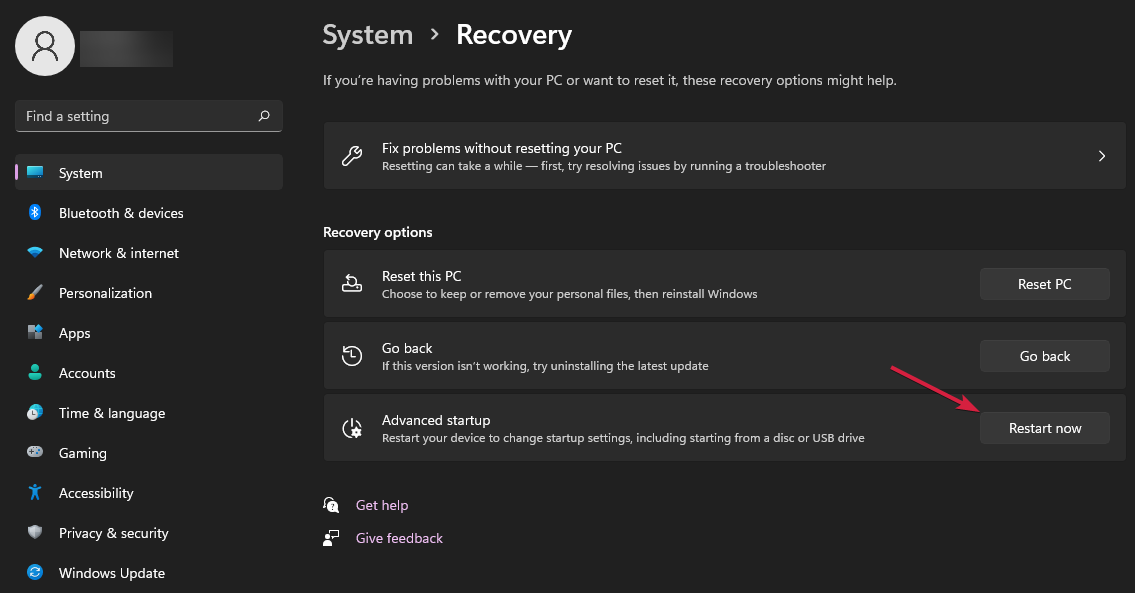
3. Select the Restart now button next to the Advanced startup section.
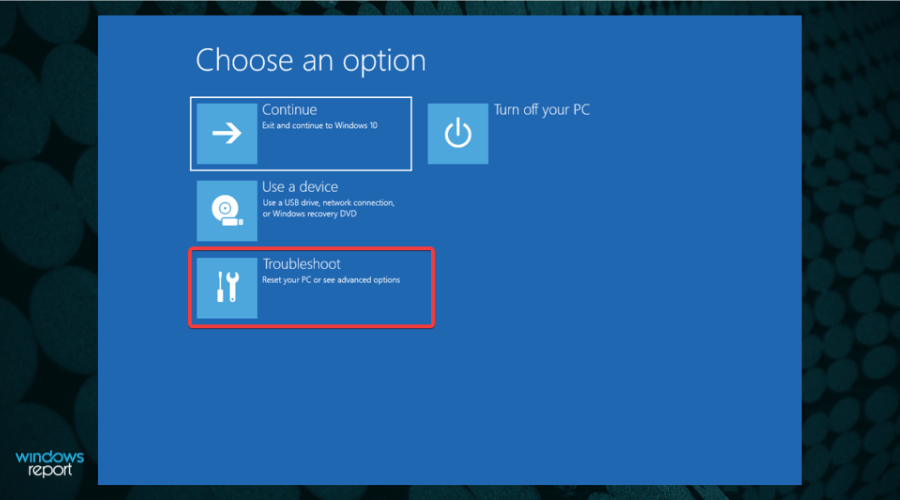
4. Your computer will restart then show the Advanced options screen. Select Troubleshoot from the options displayed, by using the arrow keys from your keyboard.
5. Select Advanced options.
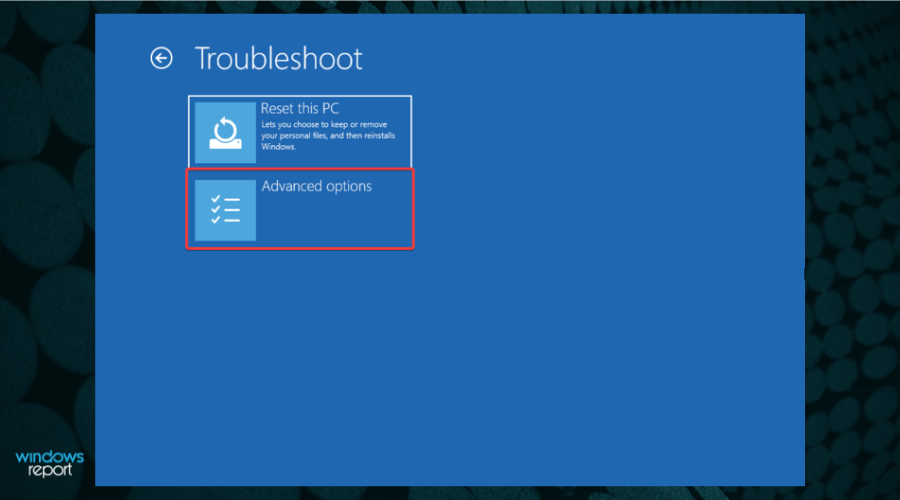
6. Choose Startup Settings.
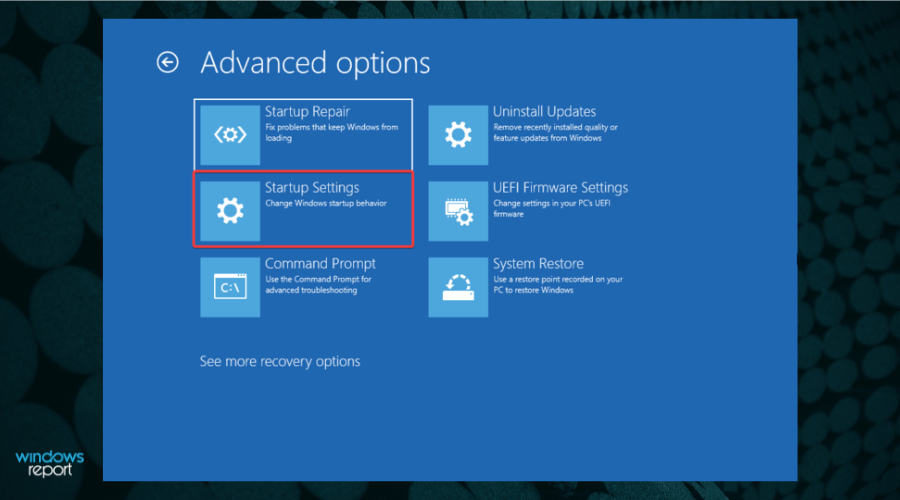
7. Click the Restart button.
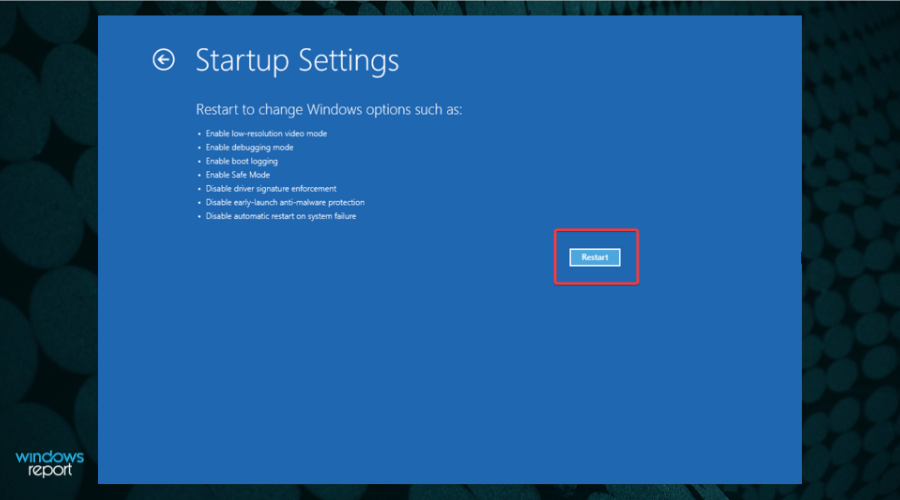
8. Press the F4 key to get into Safe Mode.
9. After your PC starts up, press Windows + I then navigate to Apps followed by Apps and features.
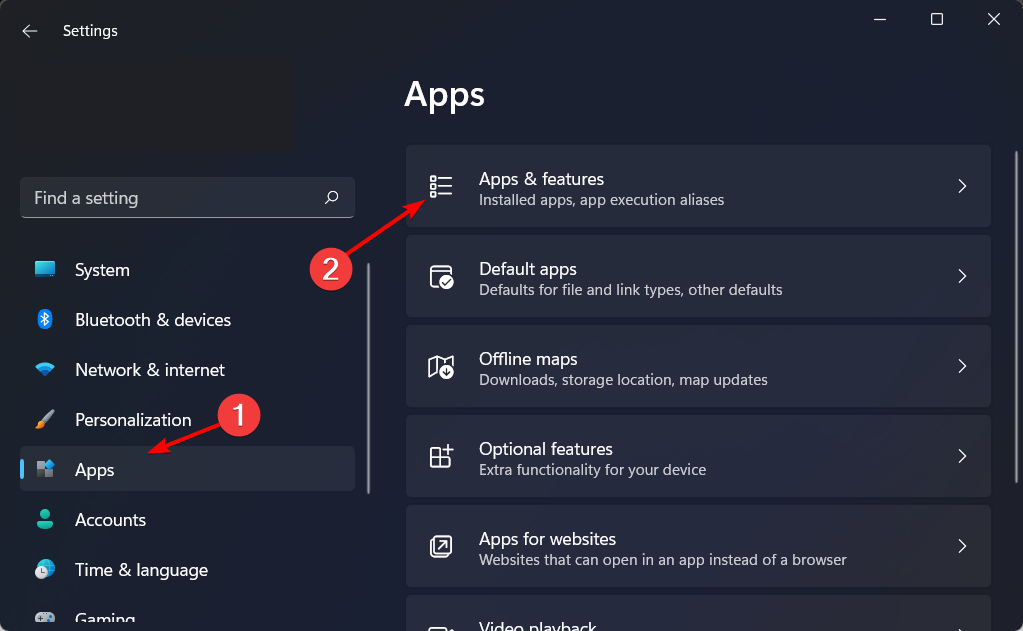
10. Here, type the name of your antivirus or application, then click the three-dot icon next to the result to choose Uninstall.
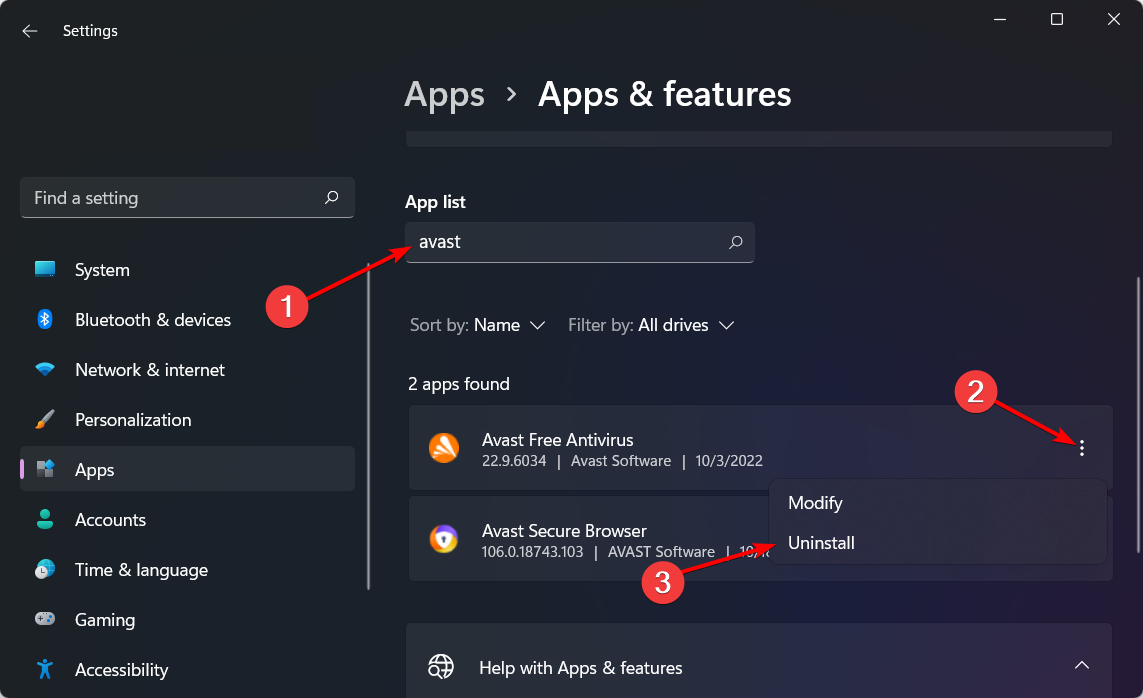
Third-party antiviruses are known to cause unwanted issues, thus as a first solution for getting the blue screen of death in Windows 11, we recommend that you remove them after entering Safe Mode.
Alternatively, you can use an uninstaller software in order to make sure the antivirus will be completely removed from your PC.
Moreover, if you have installed other third-party applications before getting the BSOD, uninstall them as well.
Once you’ve done this, the BSOD issue shouldn’t occur anymore. We recommend that you switch to a better antivirus that won’t interfere with your computer in negative ways.
3. Disable/uninstall/roll back your drivers
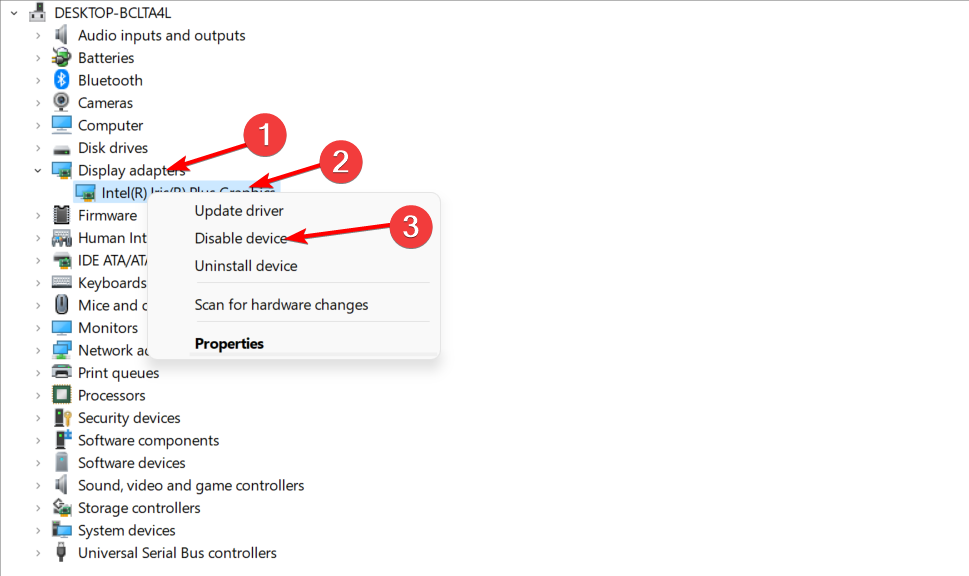
Disable the driver
- Press Windows + X and choose Device Manager from the list.
- Now locate the driver that you want to disable, right-click it, and choose Disable device.
Roll back the driver
- Press Windows + X and choose Device Manager from the list.
- Locate the driver that you want to roll back and double-click it.
- Go to the Driver tab and click on Roll back driver.
- Now follow the instructions on the screen to complete the process.
Keep in mind that you only need to update, uninstall or roll back the driver that is causing the issue, so pay attention to the driver name in the BSOD error.
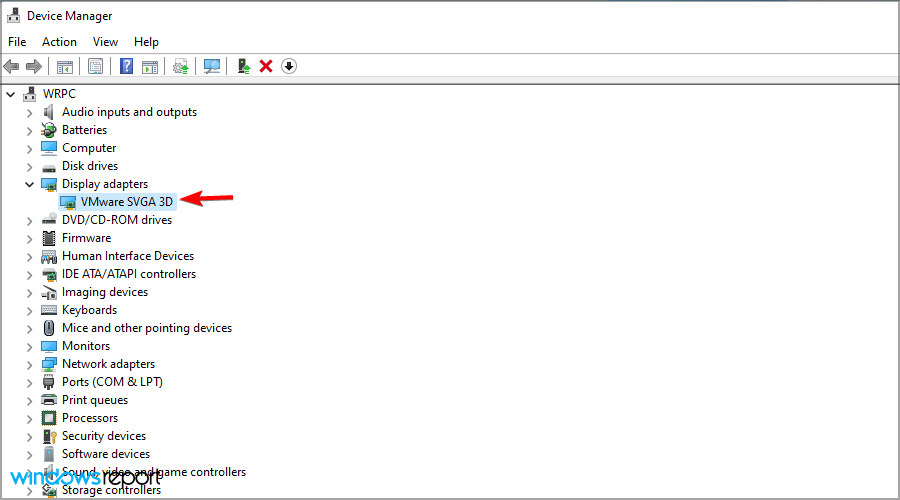
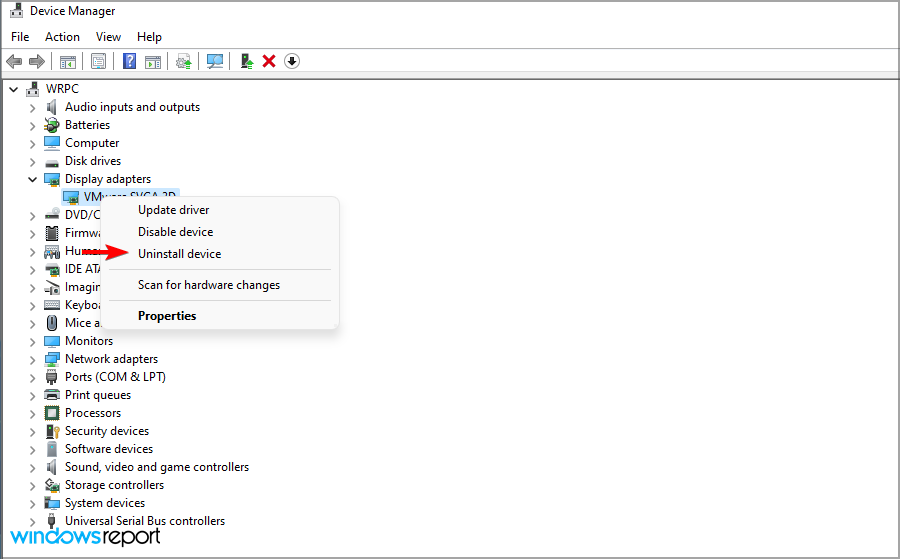
Uninstall the driver
- Press Windows + X and select Device Manager.
- Locate the driver you want to uninstall, right-click it, and choose Uninstall device.
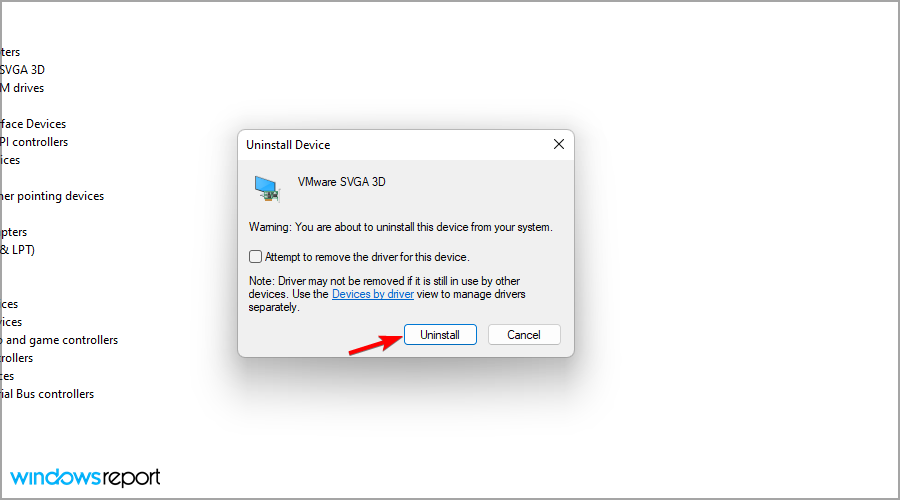
- Click on Uninstall to confirm.
- Now restart your PC and check if the problem is resolved.
Updating and reinstalling the drivers can help you fix the BSoD errors like 139, mainly caused due to corrupted drivers.
4. Uninstall recent updates
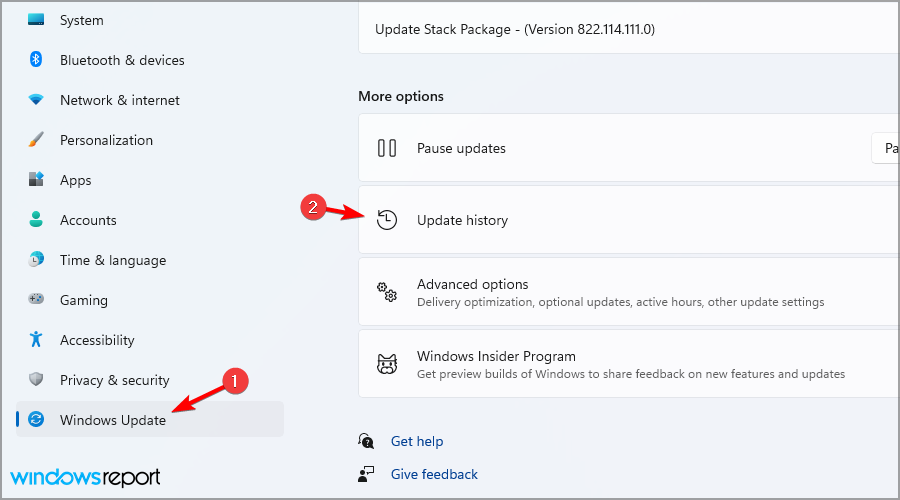
- Press Windows key + I to open the Settings app then navigate to the Windows Update section and select Update history.
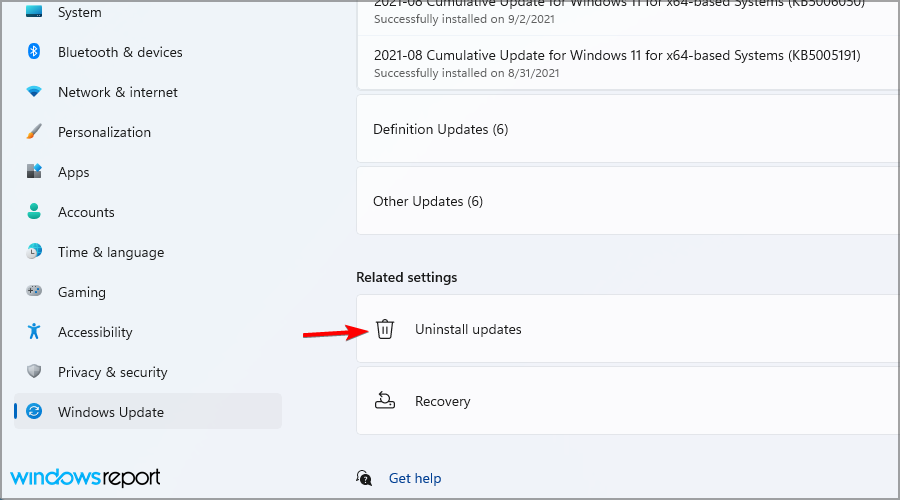
- Click on Uninstall updates.
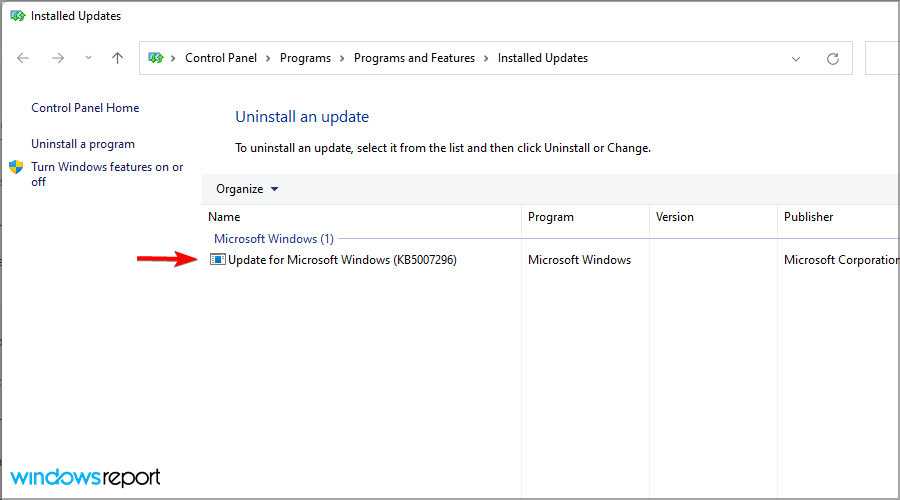
- Double-click on the update you want to remove and follow the on-screen instructions to complete the process.
Keep in mind that this solution works only if the problems started appearing after installing a new update.
5. Run SFC and DISM scans
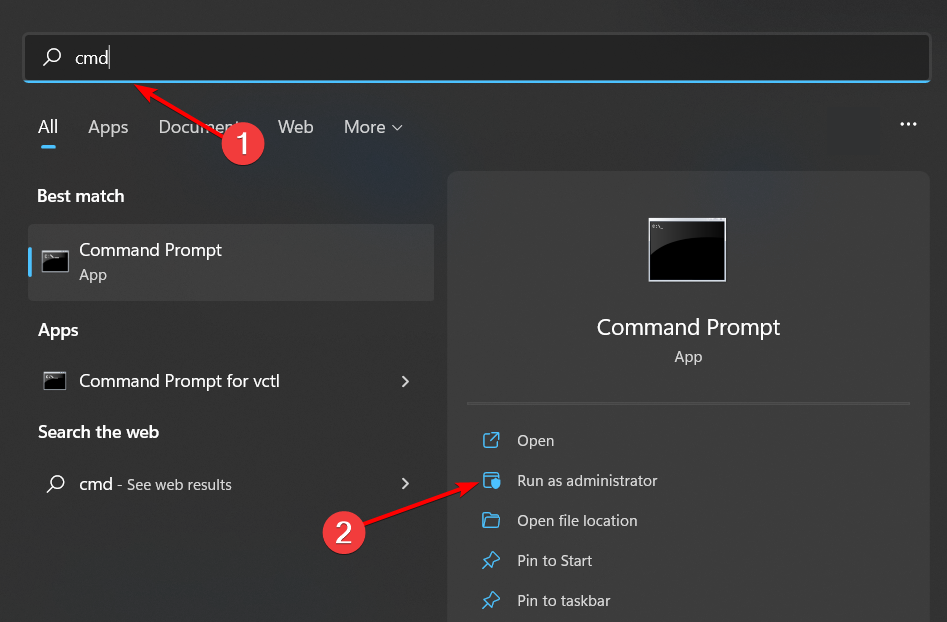
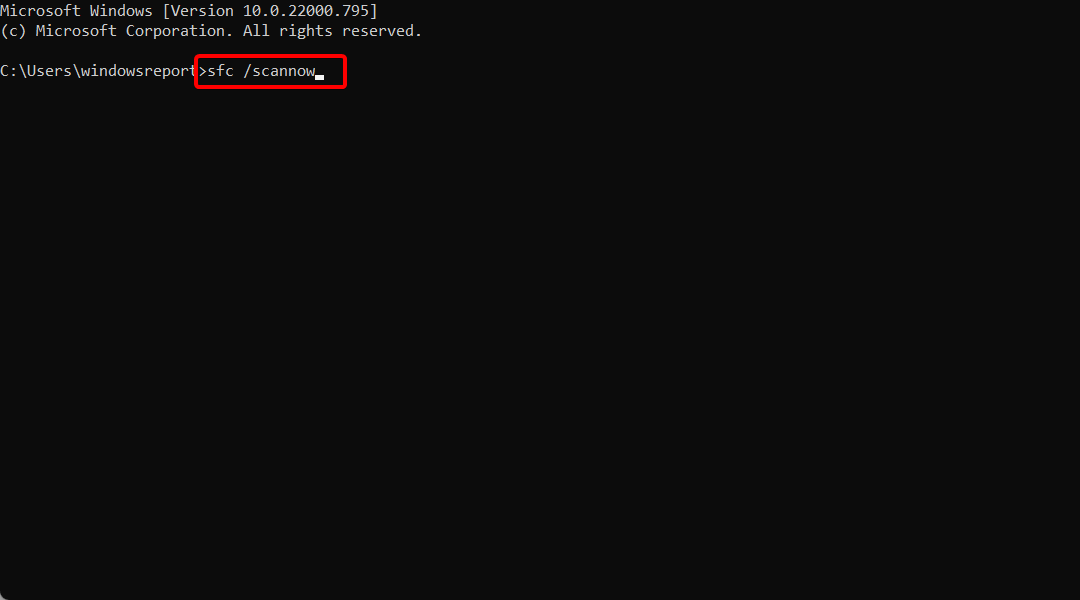
- BSODs such as the Windows 11 blue screen critical process died one, require for you to fix system files. To do this, press Windows then type cmd and open the first result as an admin by clicking the Run as administrator option under the result.
- Now type the following command and press Enter:
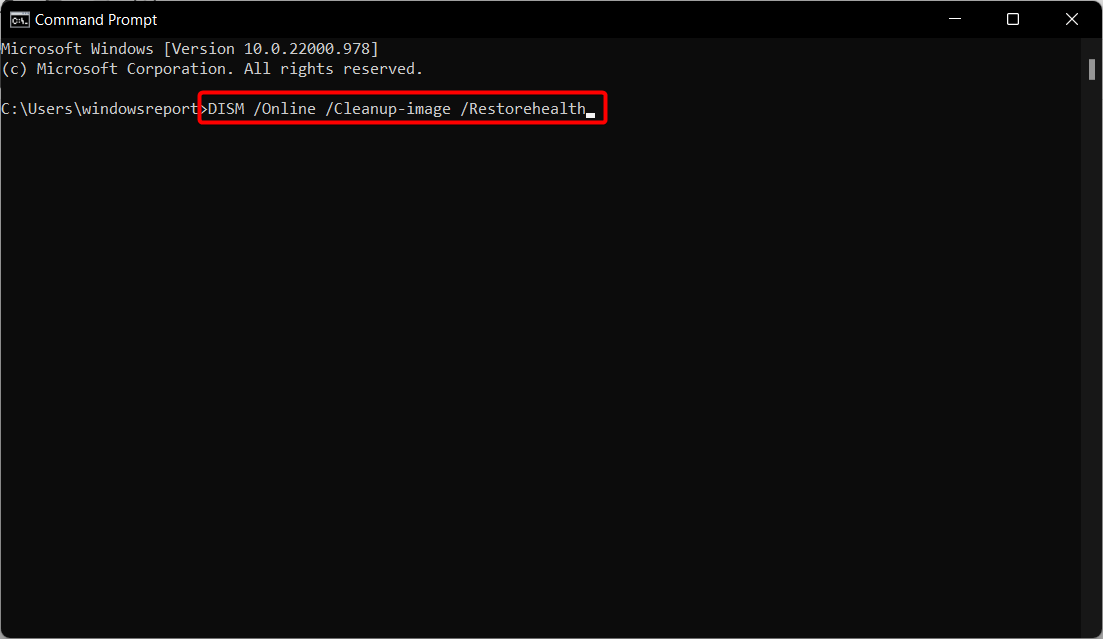
sfc /scannow - Wait for the process to finish. then type the next command and press Enter:
DISM.exe/Online/Cleanup-Image/ Restorehealth
To learn more about this feature, read our how to use DISM commands guide for more information. This is a Windows 10 guide, but all the information applies to Windows 11 as well.
6. Perform a clean boot
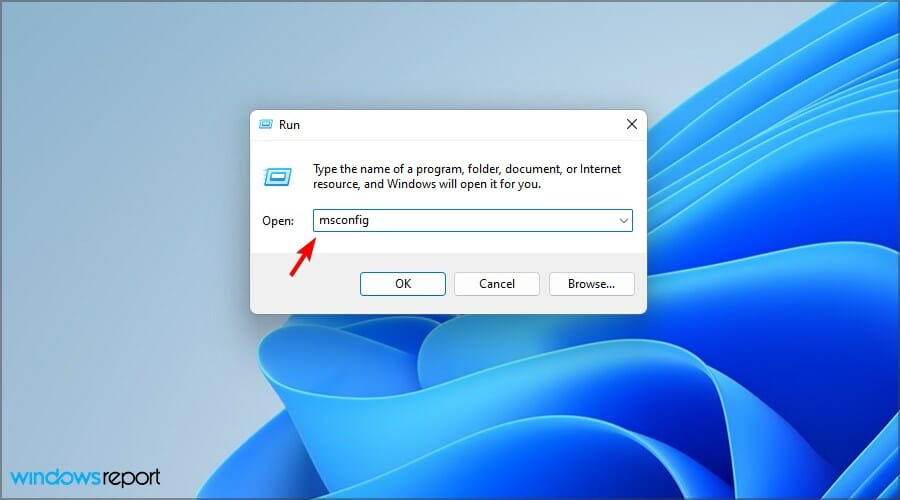
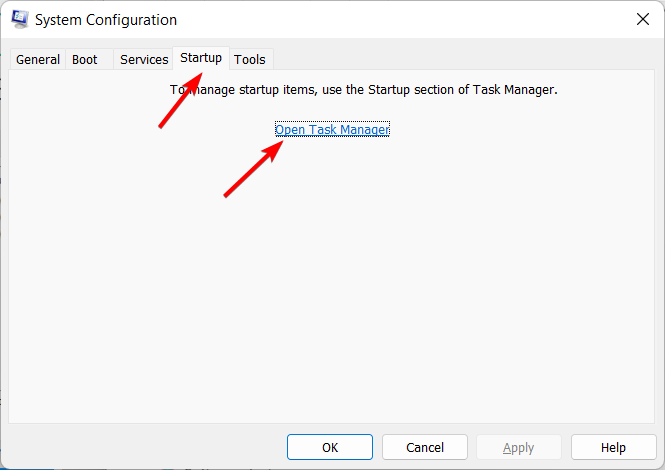
- Press Windows key + R and enter msconfig. Press Enter.
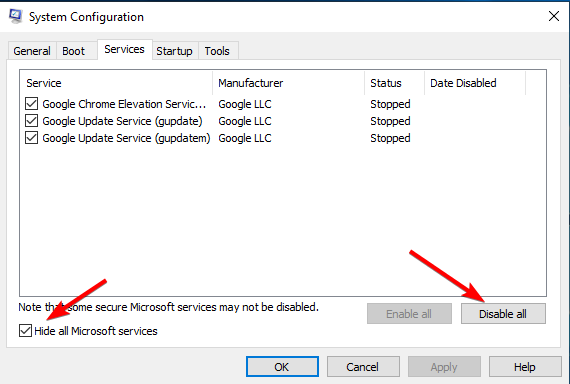
- Navigate to the Services tab and check Hide all Microsoft services. Now click on Disable all.
- Go to the Startup tab then click Open Task Manager.
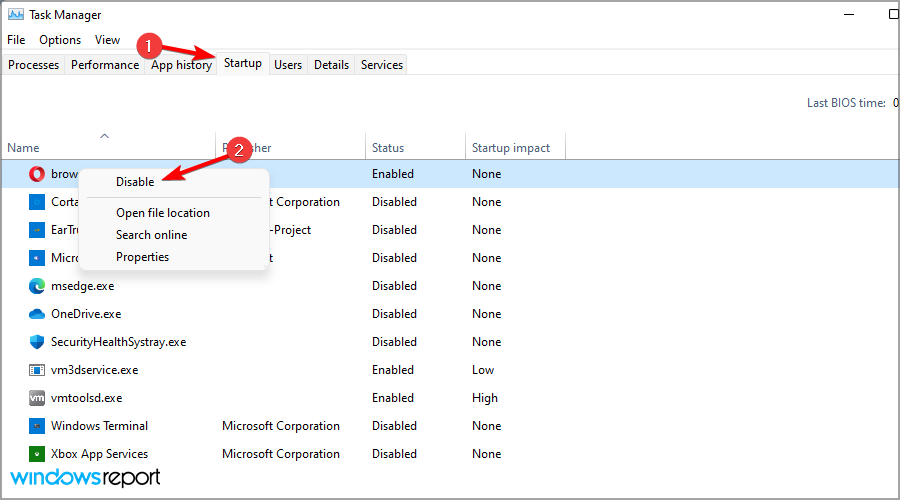
- Navigate to the Startup tab, right-click the items in there one by one, and choose Disable.
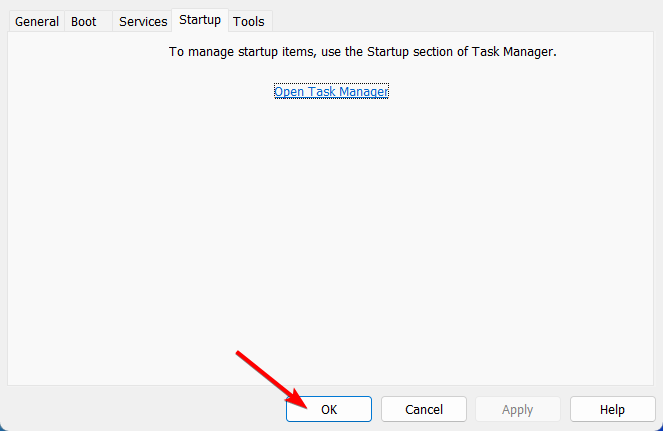
- Close Task Manager, click OK in the System Configuration window and reboot your PC.
Once your PC restarts, check if the problem is still there. If the issue doesn’t appear, enable services and startup apps one by one or in groups until you manage to find the culprit.
To learn more about starting apps with Windows, you should check our how to use Startup folder on Windows 11 guide.
7. Perform a System Restore
- Press Windows key + R and enter rstrui. Press Enter.
- Select the desired restore point and click on Next.
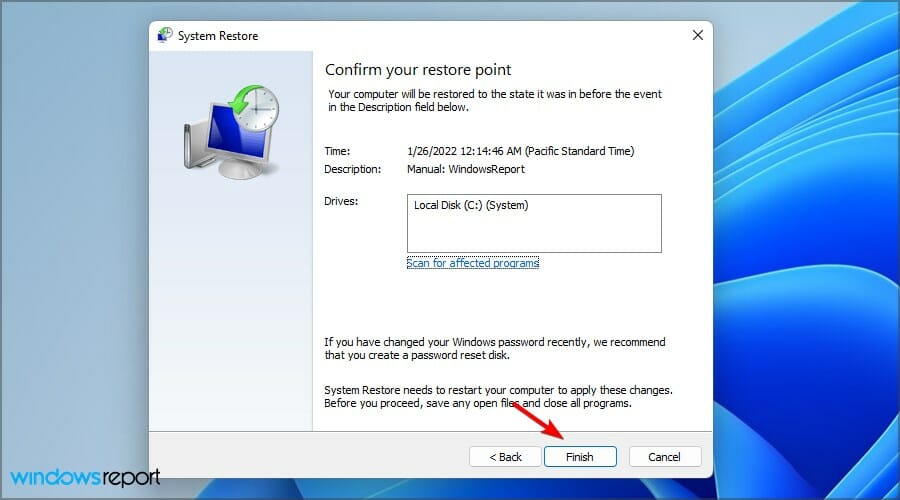
- Click on Finish.
- Wait while your PC restores your system.
Windows usually creates restore points automatically, but it’s also a good idea to do that manually from time to time. To learn more, check our guide on how to create Windows 11 restore points.
8. Go back to the previous build
- Click the Start button and select Settings.
- Now go to the Recovery section.
- Click the Go back button and follow the instructions on the screen.
Keep in mind that this option is available only for a couple of days, so if problems started appearing after installing a new build, be sure to try this option.
If for some reason you can’t use this feature, you should read our guide on what to do if the Go back button isn’t working on Windows 11.
9. Perform an in-place upgrade
- Go to the Windows 11 download page. Select the version you want to download and click the Download button.
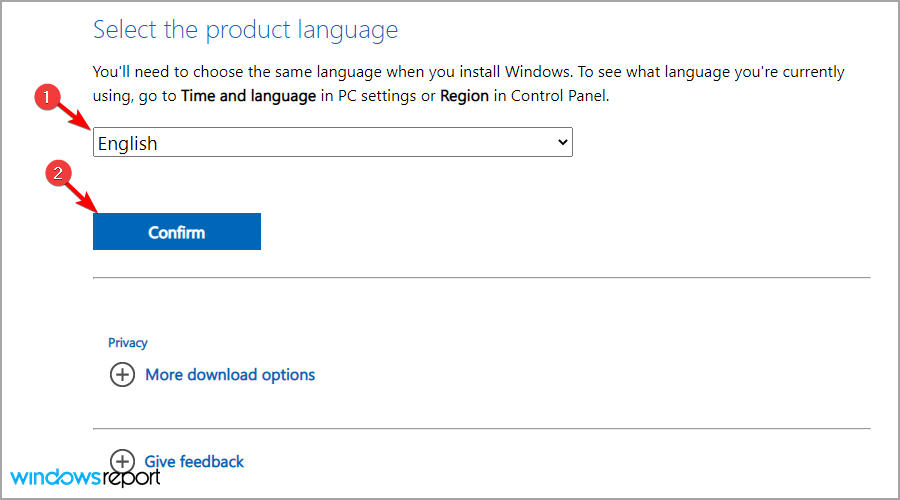
- Choose the desired language and click on Confirm.
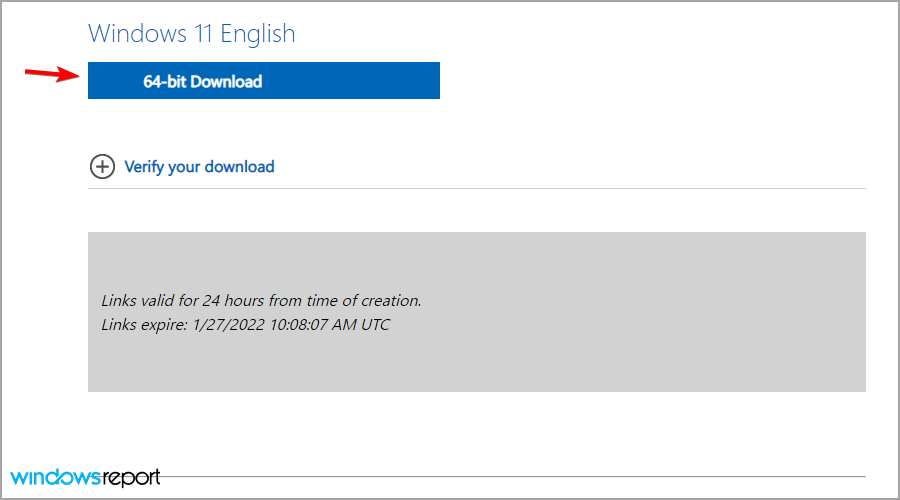
- Click on 64-bit download.
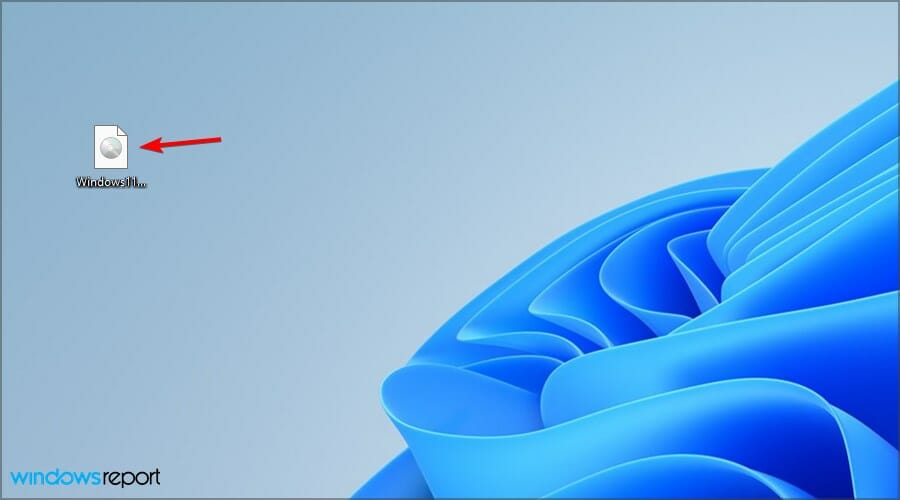
- Wait for the ISO file to finish the download. Double-click the ISO file you downloaded to mount it.
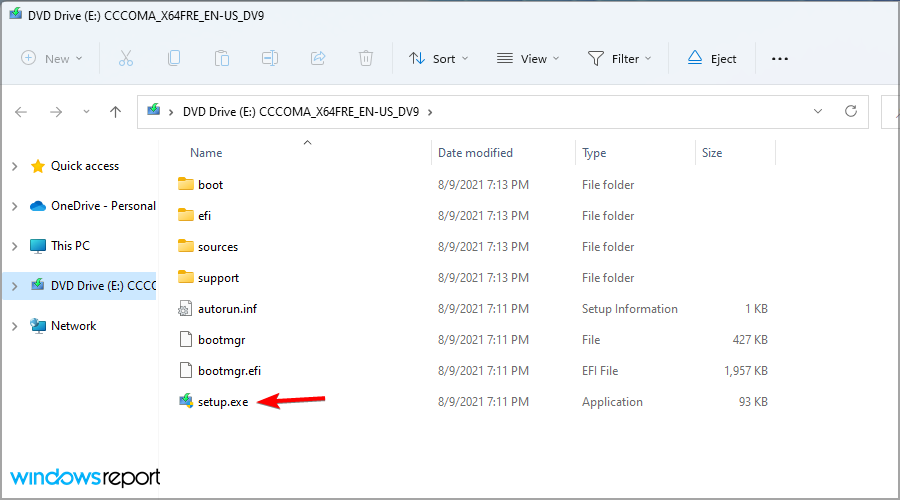
- A new window will appear. Double-click on setup.exe to run it.
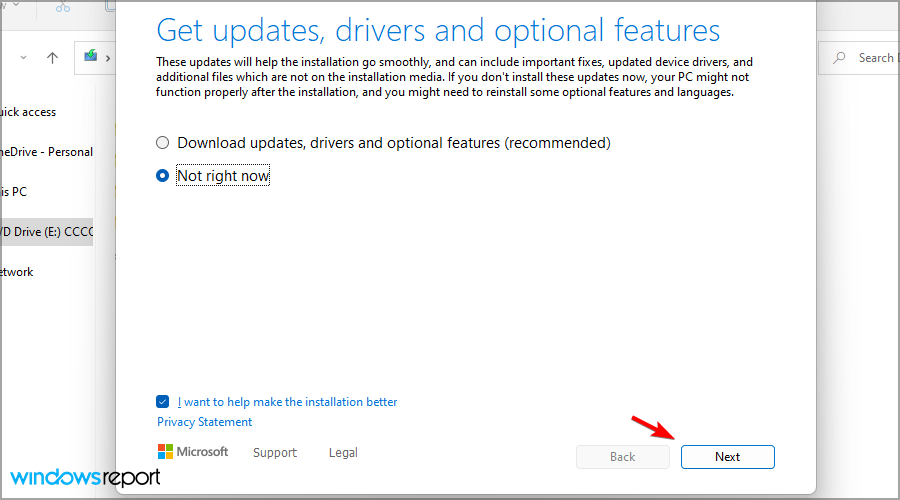
- Select if you want to download updates or not and click Next.
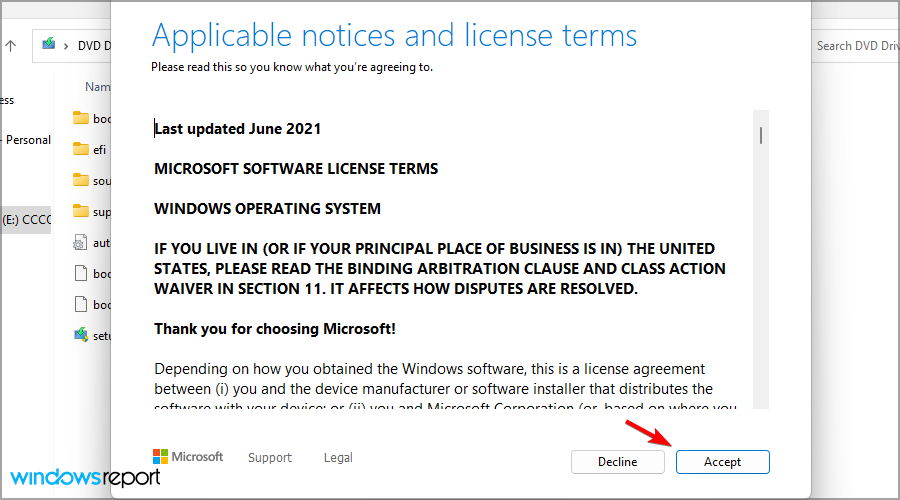
- Accept the terms of service.
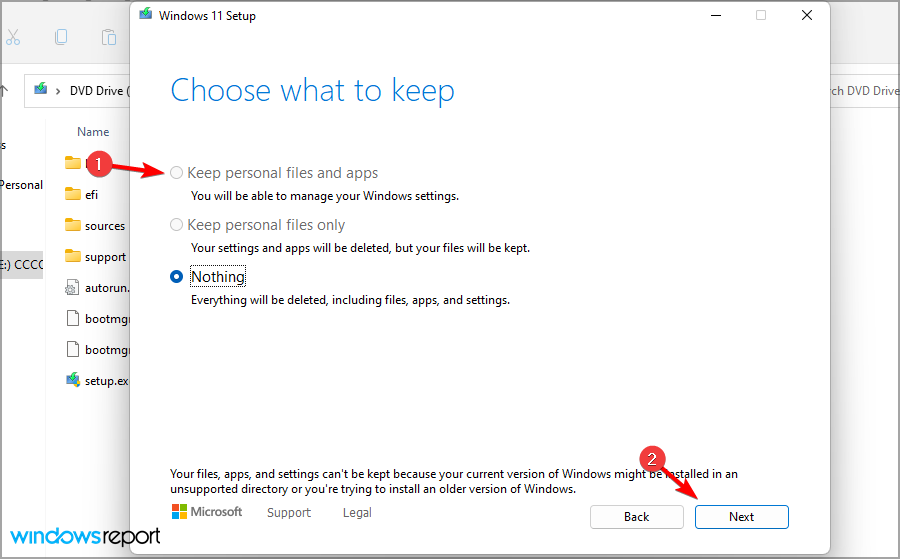
- Now choose which files you want to keep. Select Keep personal files and apps if possible and click Next.
- Follow the instructions on the screen to complete the process.
Once the setup is done, you’ll have the latest version of Windows installed, and hopefully, the issues will be gone.
10. Reset Windows 11
 NOTE
NOTE
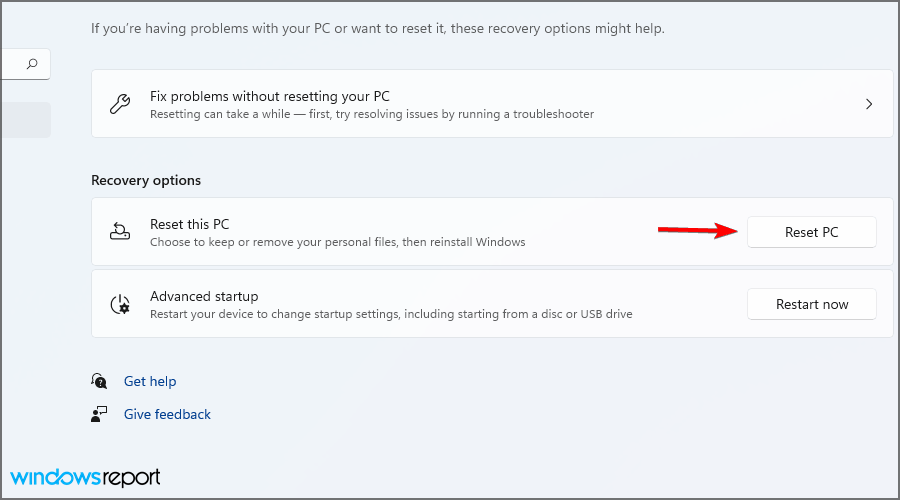
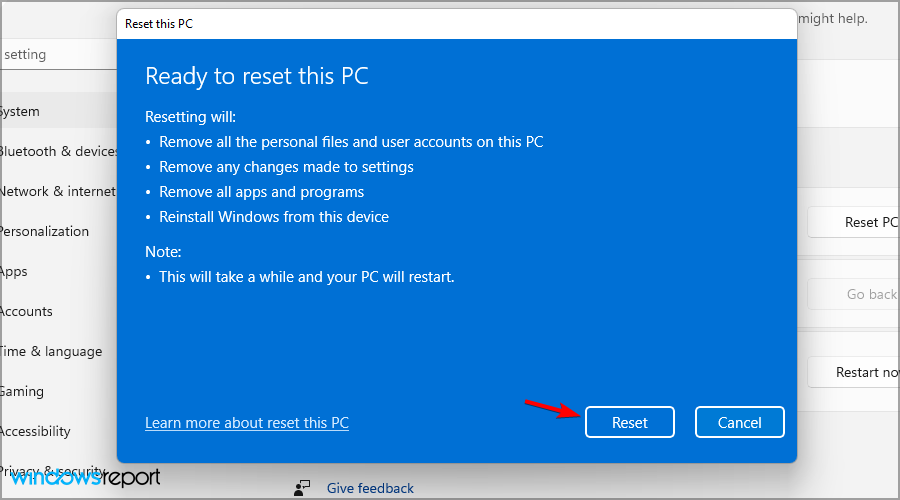
- Press Windows + I to start the Settings app. Navigate to the Recovery section.
- Click on the Reset PC button.
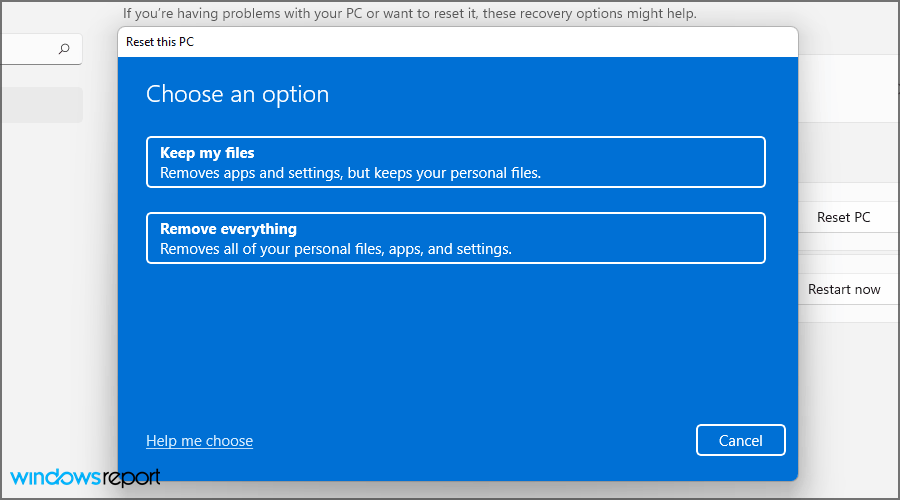
- Pick Keep files or Remove everything. The Remove everything option will remove all files from your system drive, so it might be a better choice.
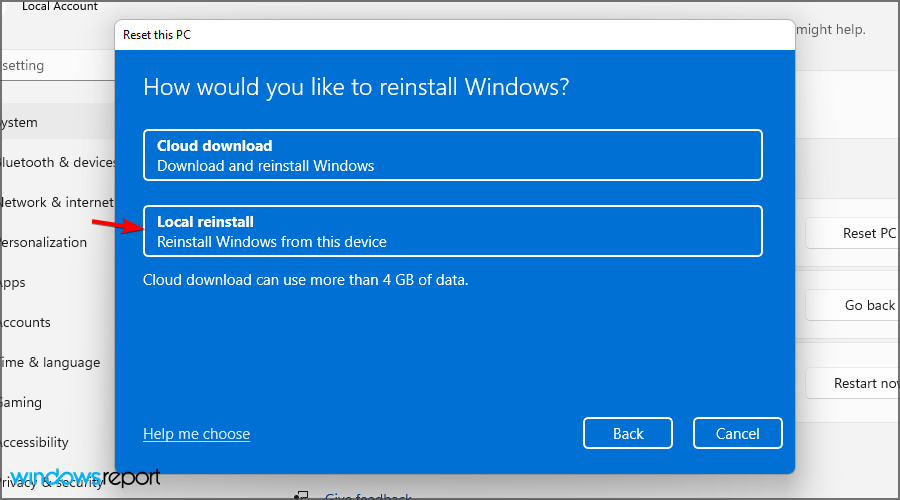
- Select Local reinstall.
- Click on Reset to confirm.
- Follow the instructions on the screen to complete the process.
For more information, visit our guide on how to reset Windows 11 to factory settings. Several users reported issues, and if you encounter them, read our Reset this PC feature not working article to see how to fix them.
Are BSOD errors dangerous?
This depends on the type of BSOD error. They will force your PC to restart, thus causing you to lose any unsaved data. This can be a problem since crashes can appear randomly several times daily.
If the error is caused by hardware failure, it’s advised to find the cause of the problem and replace the faulty component before the issue becomes more serious.
Is BSOD a virus?
No, BSOD is a system error, and it’s caused by faulty hardware or driver and software incompatibility, so it’s safe to assume that even if you get a BSOD, your PC isn’t affected by malware. Sometimes, you can even trigger a BSoD error to test for hardware defects.
These general solutions should help you fix a BSOD in Windows 11. However, the exact steps might be different depending on the issue that you’re having.
One of the common BSODs is System Service Exception in Windows 11, but we have a guide that addresses it.
Are you having issues with BSOD on Windows 11? Let us know in the comments section below.


