How to Open & Install .Cab File on Windows 11
Usually, opening a .Cab file is as simple as double-clicking it
![]() 5 min. read
5 min. read
![]() Updated on
Updated on
Share this article

Improve this guide
Read the affiliate disclosure page to find out how can you help Windows Report effortlessly and without spending any money. Read more
Key notes
- To install a cab file manually, first download it from a reliable source, then use the DISM tool.
- Keep reading to find out the detailed steps to do it.
A Windows Cabinet (CAB) file, earlier known as Diamond files, is a single file that stores various compressed files in a file library and usually comes with a .cab extension.
The file is similar to ZIP files as they both use DEFLATE, Quantum, and LZX compression algorithms to compress the files in them. If you want to open and install a .cab file on Windows 11, this guide can help!
What should you do before starting the .cab installation?
- Back up your important data.
- Create a restore point to roll back to the last known good configuration if there is any mishap.
- Ensure you download a compatible file from a reliable source.
- Learn about the components of the file so that you are aware of the changes it will make.
- Check if you have Command Prompt or Windows PowerShell installed.
- Ensure you invoke these CLI tools with admin privileges.
After making these checks, you can continue with the installation process.
How can I install .cab files on Windows 11?
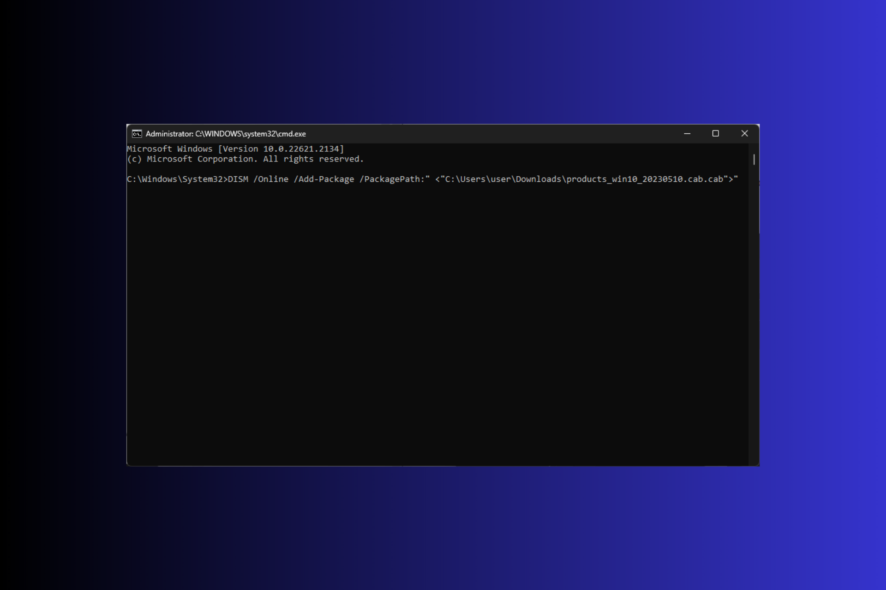
- Press Windows + E to open File Explorer. Locate the .cab file setup you want to install, right-click it, and choose Copy as path.

- Press the Windows key, type cmd, and click Run as administrator to launch Command Prompt.

- Type the following command to install the .cab file using the DISM tool after replacing PATH with the file location you copied and press Enter:
DISM /Online /Add-Package /PackagePath:" <PATH>"
- Once completed, restart your PC to see the changes.


You can use the same command to install the .cab file on an earlier version of Windows and to extract a .cab file on Windows 10/11.
Remember that installing the .cab files manually has its risks. Even if you are sure you are using the correct file format with the right version, keep the recovery options ready so you can either roll back to the previous version or perform a clean installation in case of emergencies.
What are .cab files used for?
- Updating Windows – Distributes updates and patches required to add updated components & fixes to the existing installation efficiently, even to a large number of users.
- Installing component or software – As it may contain files like DLLs, images, configuration files, fonts, and other essential resources, Windows use it to install software or component.
- Storing components or updates – Stores and deploys components and updates, which allows better control over the modular structure of the operating system.
- Installing device driver updates – Driver updates are also packaged and distributed in the .cab format for installation for better efficiency.
What can I do if the .cab file doesn’t install?
- Try restarting your computer; it can be a neat trick to make the problem disappear.
- Ensure you have downloaded the .cab file correctly, or try downloading it again.
- Verify the file integrity.
- Ensure you have free space on your system drive.
- Run your computer in safe mode and try to install the file.
If these didn’t help, move to the steps mentioned below.
1. Run SFC & DISM scans
- Press the Windows key, type cmd, and click Run as administrator to launch Command Prompt.
- Copy & paste the following command to fix system file corruption from the Windows Component Store and hit Enter:
sfc /scannow
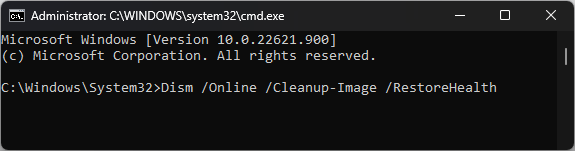
- Wait for the command to run, then type the following command to repair Windows system image corruption using Windows Update and press Enter:
Dism /Online /Cleanup-Image /RestoreHealth
- Upon completion, reboot your computer.

2. Disable Windows Firewall temporarily
- Press the Windows key, type windows security, and click Open.

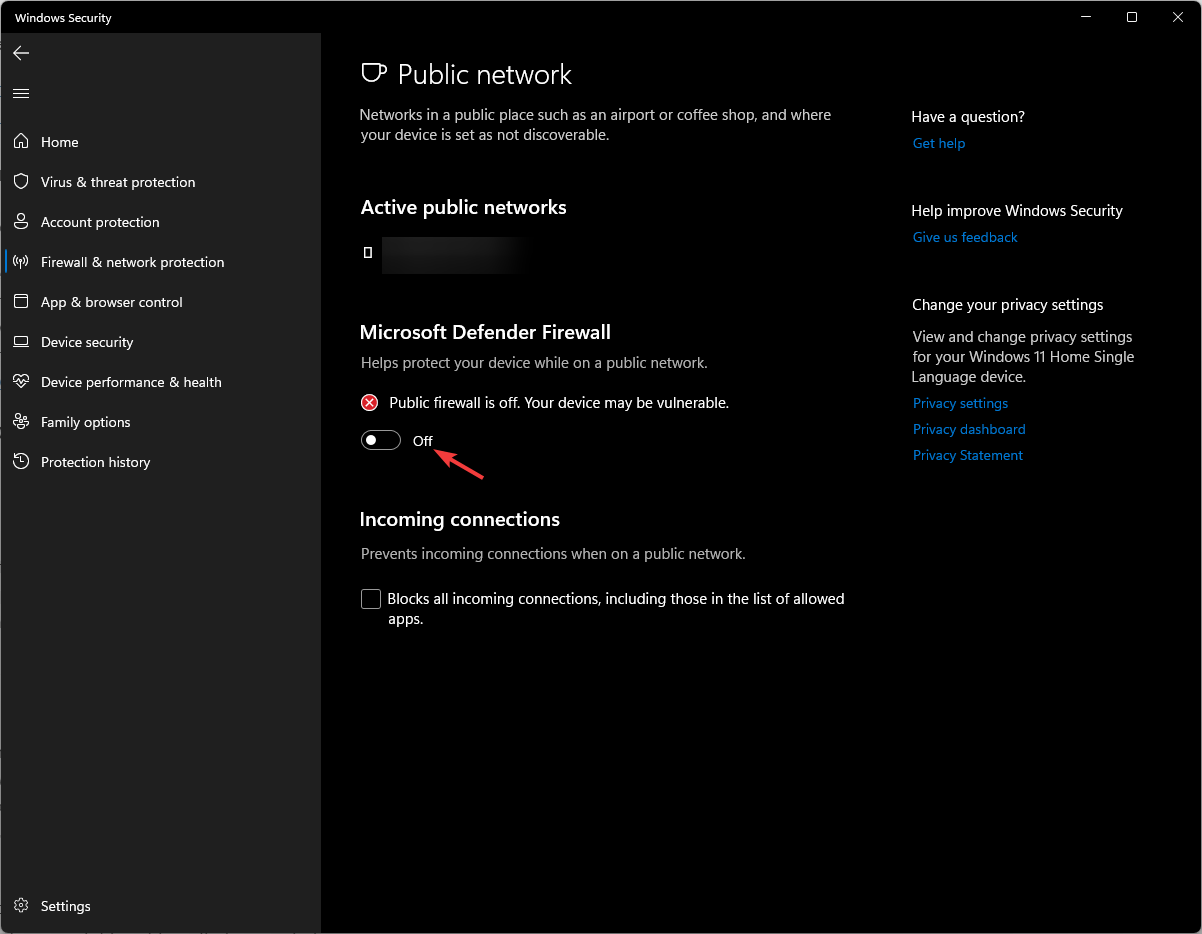
- On the Windows Security page, select Firewall & network protection from the left pane.
- You will get three profiles, Domain network, Private network, and Public network.

- Go to each profile, locate Microsoft Defender Firewall, and toggle off the switch to disable the Firewall.
- Once you install the file, don’t forget to turn the Firewall back on using the same steps.


If you are still unable to install the .cab file and facing errors like 42127 cab archive is corrupted, it could be because the file is corrupt or not downloaded properly.
How can I check if a .cab file is installed correctly?
1. Use Command Prompt
- Press the Windows key, type cmd, and click Run as administrator to launch Command Prompt.
- Copy & paste the following commands to get the list of installed components & packages on your device and press Enter:
dism /online /get-packages
- Go through the list and check if you see the one you installed.
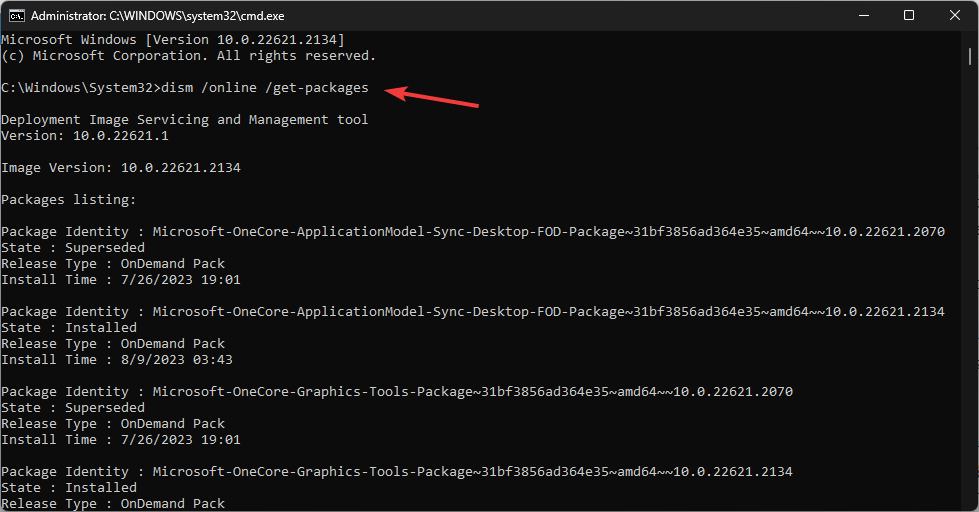
You should choose this method if you have used the DISM command to install the file.
2. Check the packages list from Registry Editor
- Press Windows + R to open the Run dialog box.

- Type regedit and click OK to open Registry Editor.
- Navigate to this path:
Computer\HKEY_LOCAL_MACHINE\SOFTWARE\Microsoft\Windows\CurrentVersion\Component Based Servicing\Packages
- You will get the list of packages on your computer; go through it and check if the package related to the .cab file is there to ensure it is installed correctly.


You can also check the Event Viewer logs to locate the file installation event or run an SFC scan to verify the system files’ integrity.
If you have installed the Windows 11 Update manually using the .cab file, the quickest way to verify the successful installation would be to check the Windows Update history.
To conclude, remember always to restart your PC after the installation and test the file (if it’s meant to fix an issue) to ensure everything is as intended. If you bump into any issues or need more info about .Cab files, don’t hesitate to comment in the section below.