4 Easy Ways to Disable the Windows 10 Mail App
Learn how to disable its notifications or uninstall it completely
3 min. read
Updated on
Read the affiliate disclosure page to find out how can you help Windows Report effortlessly and without spending any money. Read more
Key notes
- The Mail App is pre-installed by default on Windows 10 PCs.
- However, some users do not need its features and want to disable it.
- You can turn off the app's notifications, turn off the background app, or directly uninstall the app.
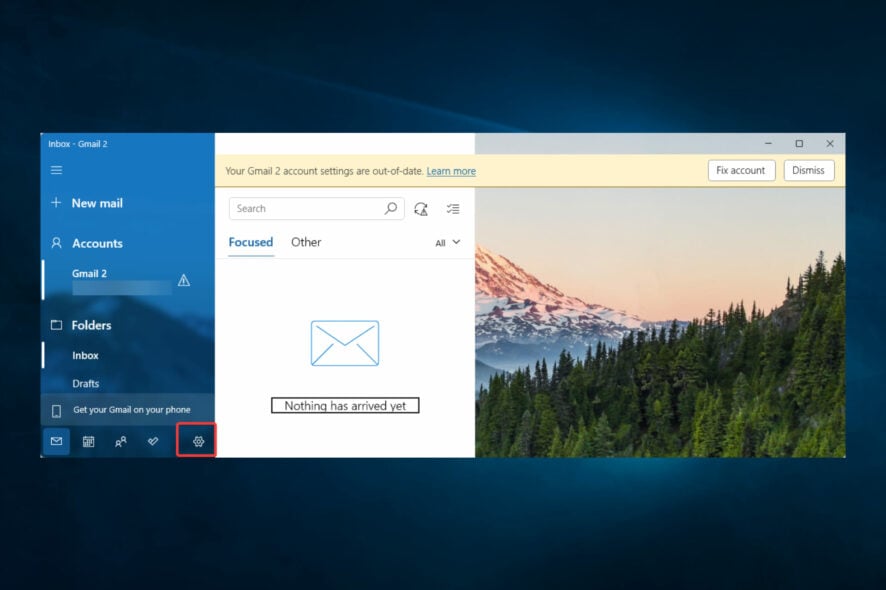
The Mail and Calendar is one of the default apps pre-installed with Windows 10, however, some users might prefer to disable the Mail background app to free up system resources or turn off its notifications.
Some users might want to remove the Mail App altogether so that it can’t conflict with their preferred email client software, such as Outlook, in any way.
This guide will be beneficial if you belong to any of these categories.
What happens if I Uninstall email in Windows 10?
If you uninstall the email app in Windows 10, you will no longer be able to access and manage your email accounts through the app.
However, your email accounts and messages will still exist on the email servers and can be accessed through web browsers or other email clients. Additionally, any settings or preferences associated with the app will be lost.
Let us now explore the best options to disable Windows 10 mail app.
How can I disable the Mail App in Windows 10?
1. Turn off the Mail App’s notifications
Users who need to disable Mail’s notifications can do that by adjusting the app’s notification settings.
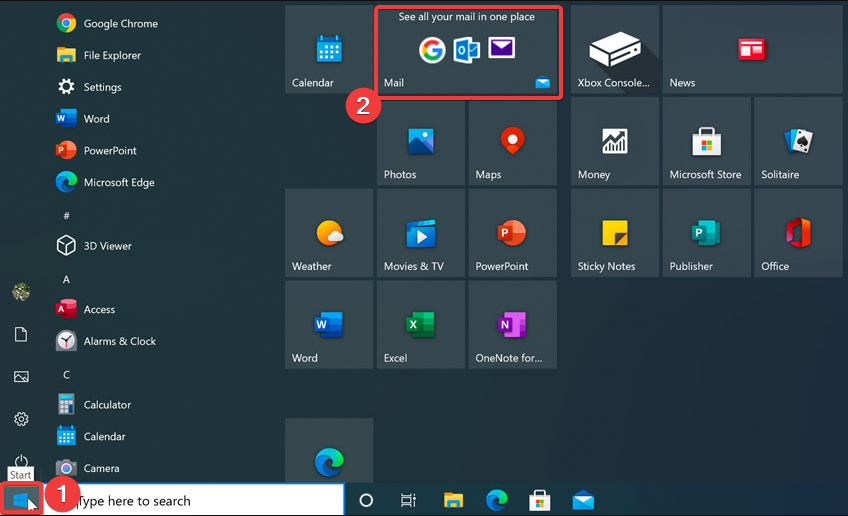
- First, click Mail on the Start menu.
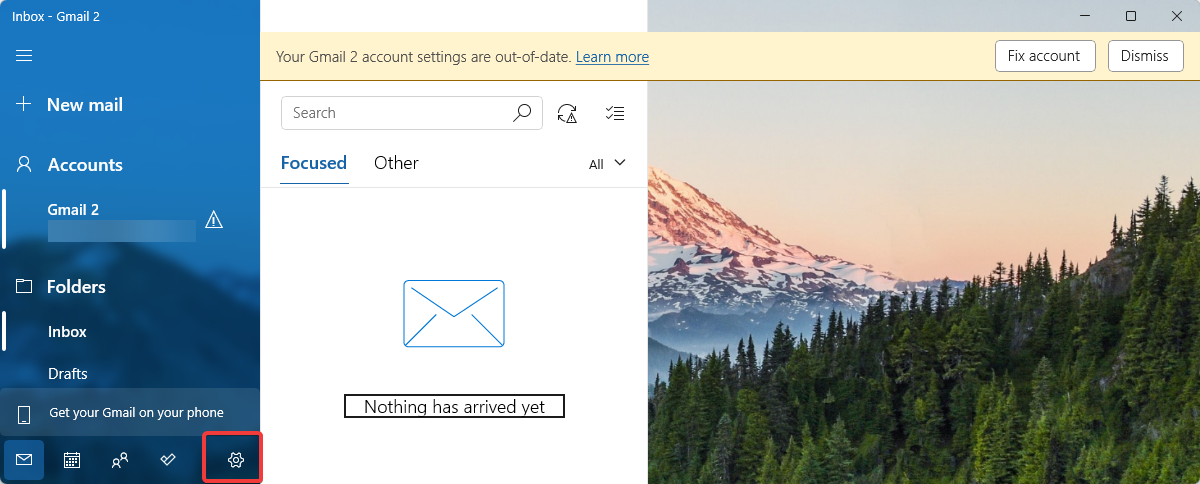
- Then click the Settings button.
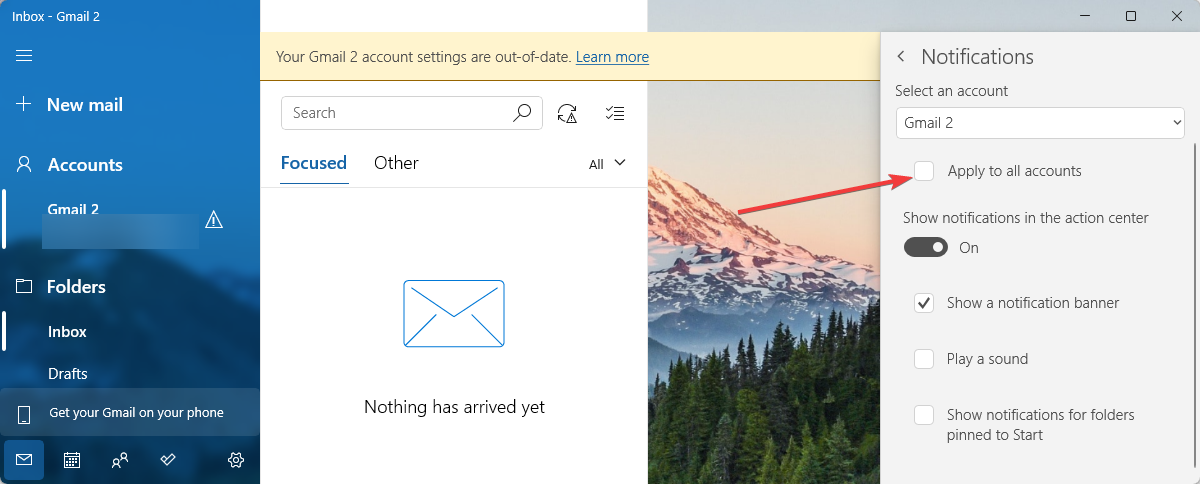
- Click Notifications.
- Select the Apply to all accounts option.
- Then turn off the Show notifications in the Action Center setting.
2. Disable the Mail App from running in the background
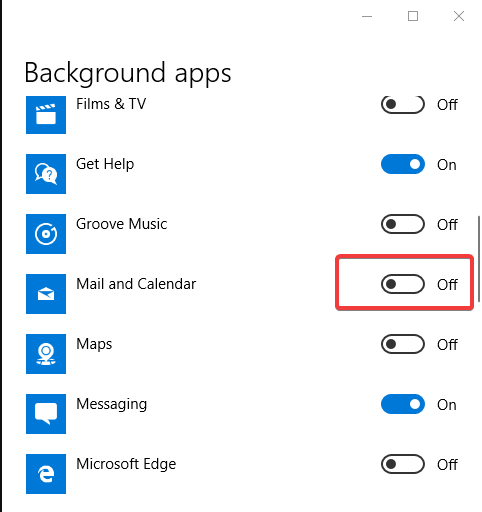
- Users can disable Mail running as a background app via Settings. To do that, press the Windows key + S hotkey, enter the keyword background app in the search box and open the app.
- Then turn off the Mail and Calendar app setting.
3. Uninstall the Windows Mail App
1. Press the Windows Key.
2. Type apps in the search bar.
3. Select Apps & features from the list to open the window shown directly below.
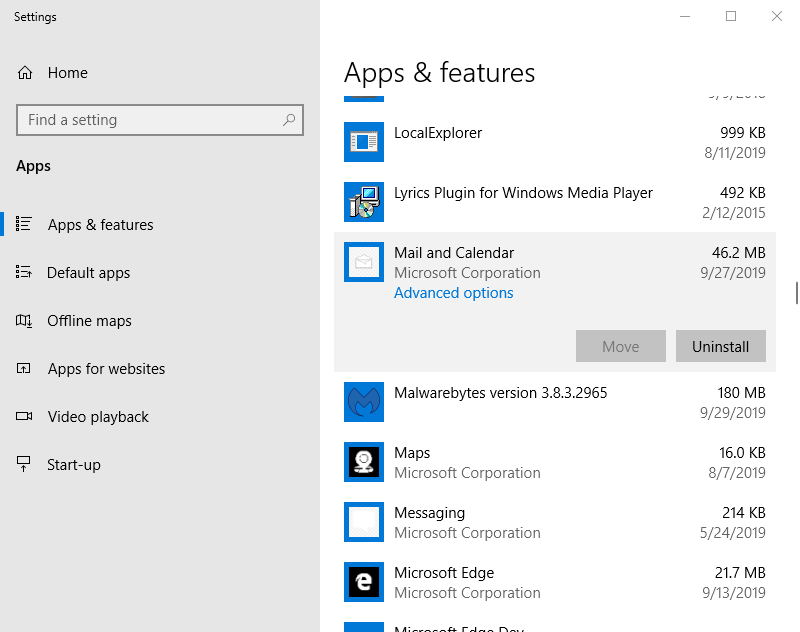
4. Scroll down to the Mail and Calendar app.
5. Press the Uninstall button. This will complete the uninstallation. However, if you are using an older Windows 10 build, jump to the next step.
6. In older build versions, some users might need to remove Mail and Calendar with PowerShell. Enter PowerShell in Windows 10’s search box.
7. Right-click PowerShell and select the Run as administrator option.
8. Then input the following command: Get-AppxPackage Microsoft.windowscommunicationsapps | Remove-AppxPackage

9. Press the Enter key to run the command. This will uninstall the Mail App.
Users who don’t need Mail can completely uninstall the app to disable it. This ensures that the app is completely gone from your Windows 10 PC.
4. Terminate Mail
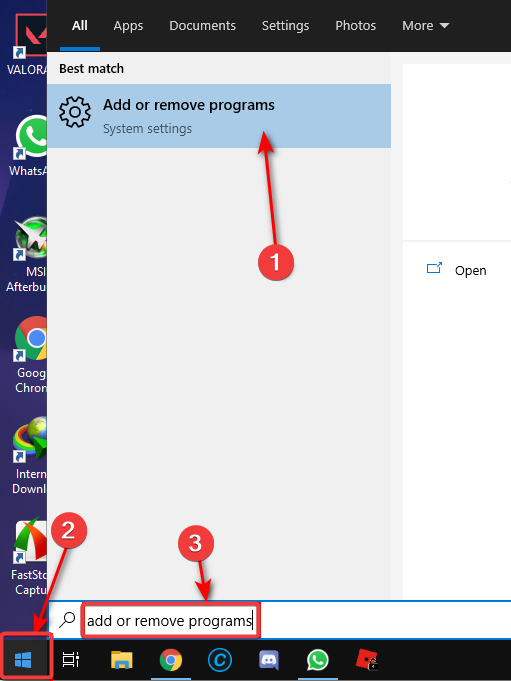
- Press the Windows key, type add or remove programs and click the app.
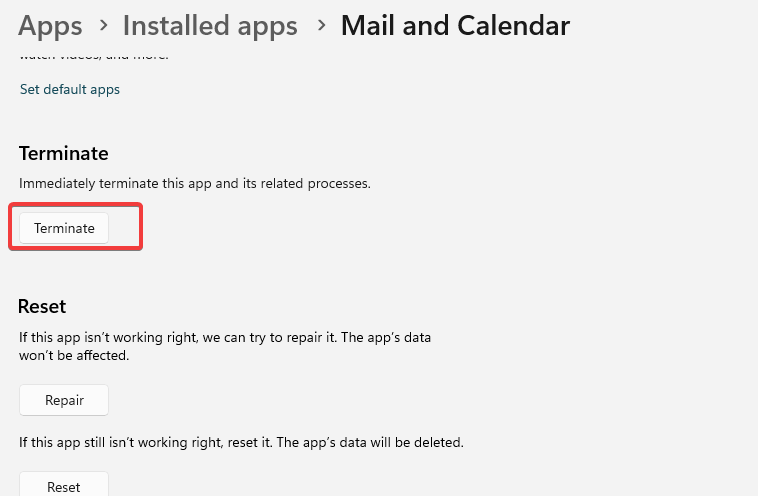
- Search for Mail and Calendar on the right pane and click Advanced options.
- Scroll down and click Terminate.
So, that’s how users can disable Mail. In addition, users who need to utilize that app can disable the Mail background app and turn off its notifications.
Those who utilize Outlook can uninstall Mail to disable the app and ensure no email client conflicts.
If you stumble across the email error code 0x80040b0b, the highlighted guide will provide the necessary solutions to fix it.
We hope this article helped you turn off the Windows Mail app on your device. If you have any issues trying our solutions, let us know in the comments below.

