Fix: This Page is Blocked by Microsoft Edge
Less rules for wider access to websites
4 min. read
Updated on
Read the affiliate disclosure page to find out how can you help Windows Report effortlessly and without spending any money. Read more
Key notes
- To fix this page has been blocked by Microsoft Edge error, disable any suspicious extensions and lighten the tracking rules.
- Your firewall could also be the culprit, so you may have to disable it temporarily or whitelist the blocked site.
- Stay tuned as we uncover more ways to regain access to these sites.
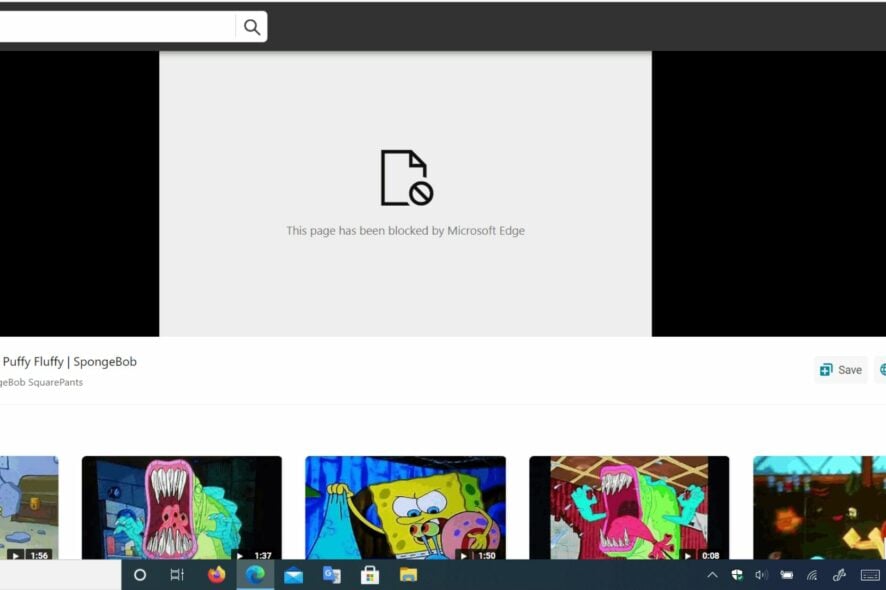
Occasionally, Microsoft Edge will block access to a page because it is deemed unsafe. Other times, it’s a mistake that you can fix with a few tweaks.
WindowsReport experts have experienced this issue and bring you top solutions for this error.
How do I unblock this page is blocked by Microsoft Edge?
Check off the following basic steps before the slightly technical solutions:
- Try the site on another browser to establish whether the issue is with your network or Microsoft Edge.
- Ensure you’re using the latest version of Microsoft Edge.
- Check whether your ISP or firewall is blocking certain connections.
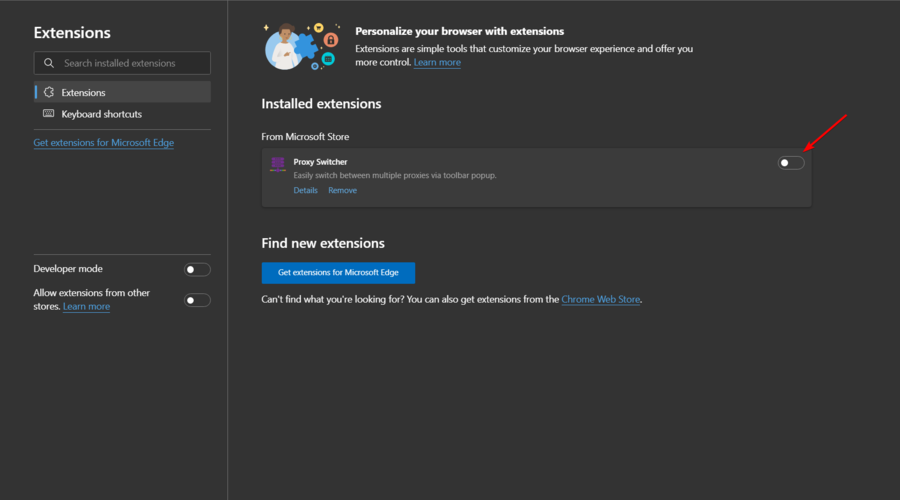
1. Disable extensions
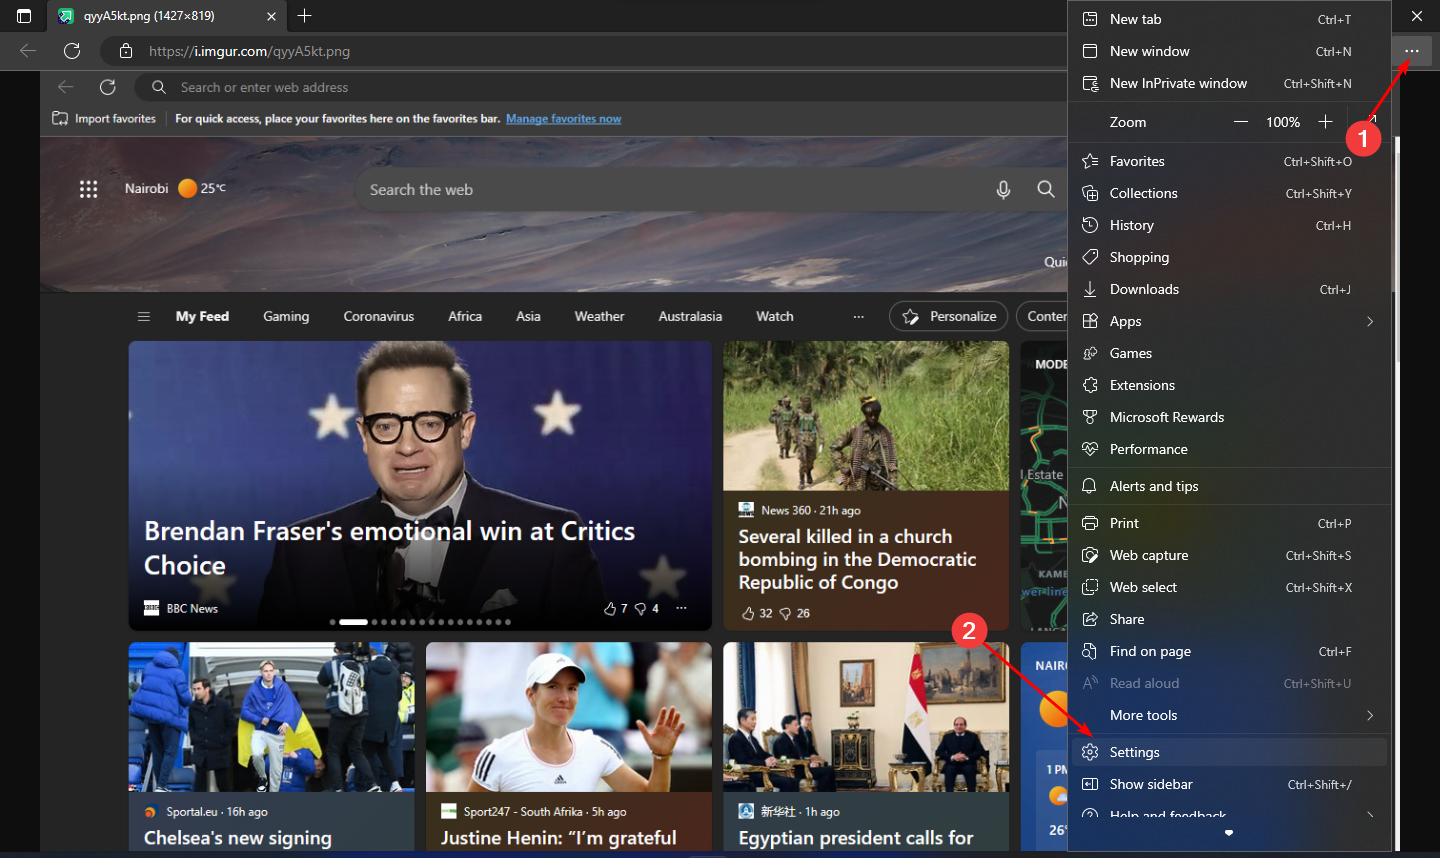
- Open Microsoft Edge and click on the three horizontal ellipses at the top right corner.
- Click on Extensions, then select Manage extensions.
- Locate any recently added extensions and toggle the off button. Ad blockers are the most popular culprits so start off with those.
If the culprit is a critical extension, you can reinstall it. Sometimes, a corrupted or outdated extension tends to cause issues with certain web pages, but once they’re updated, they’re good to go.
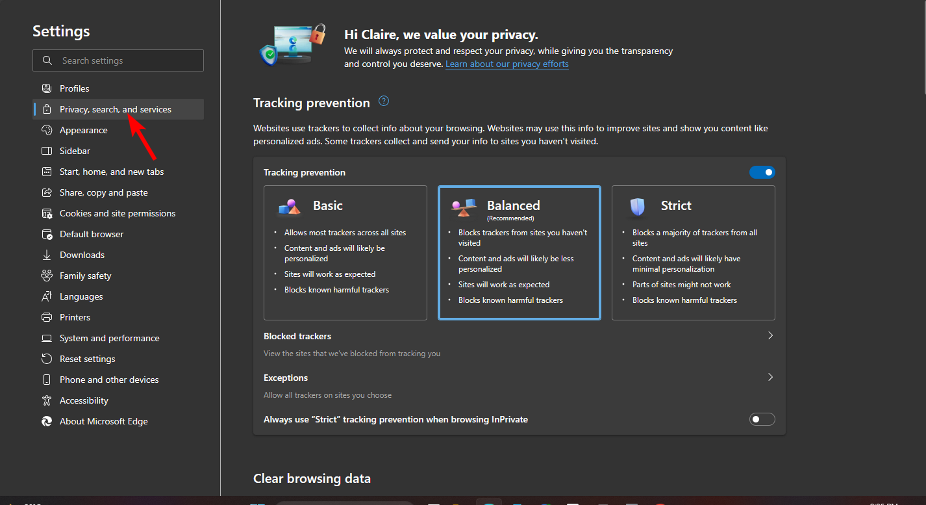
2. Adjust your tracking prevention settings
- Open Microsoft Edge and click on the three horizontal ellipses at the top right corner.
- Click on Settings.
- Select Privacy, search, and services.
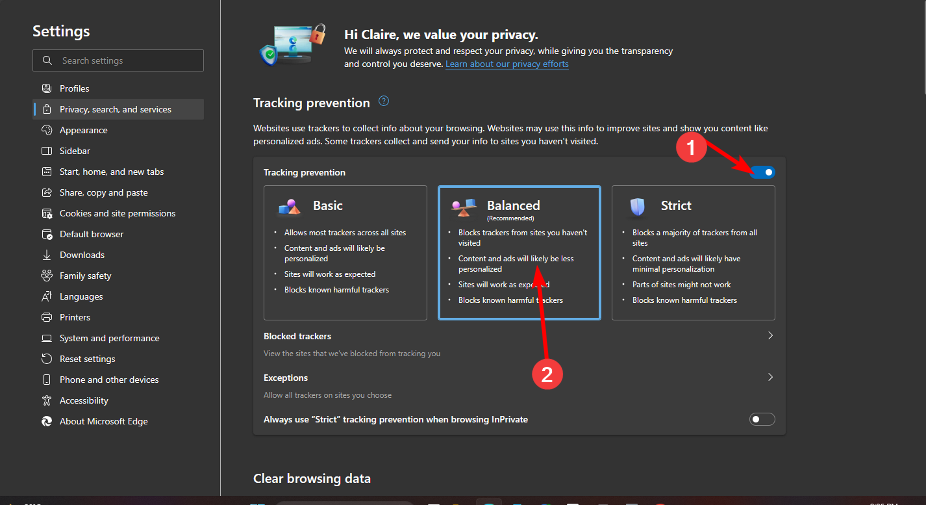
- Toggle on the Tracking prevention option and click on Balanced.
Your browser may have come in the Strict setting, which offers maximum protection by blocking tracking cookies used by third-party advertisers to track your browsing behavior. The problem with this is that it blocks most of the websites and makes them inaccessible.
With the Balanced setting, you get most of the benefits of stricter settings while avoiding the risk of getting blocked. Better yet, you can enable web filtering to take charge of what content is displayed on your browser.
3. Add the blocked site as a trusted site
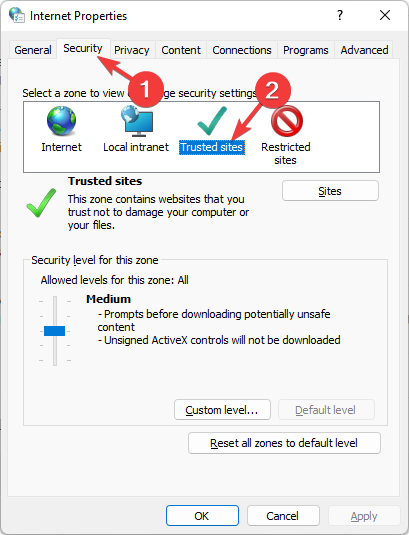
- Open the Start Menu, type Internet options, and hit Enter.
- Go to the Security tab and select Trusted sites.
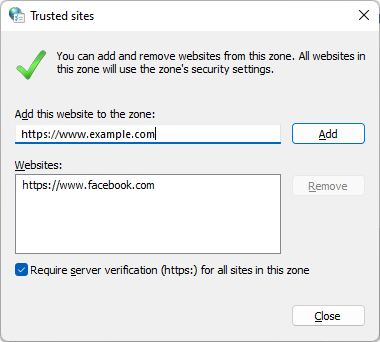
- Click on Sites.
- Add the problematic website to the trusted site list.
- Restart your computer.
This may also be the reason why Edge keeps logging you out of Google if it’s a blacklisted site.
4. Repair Microsoft Edge
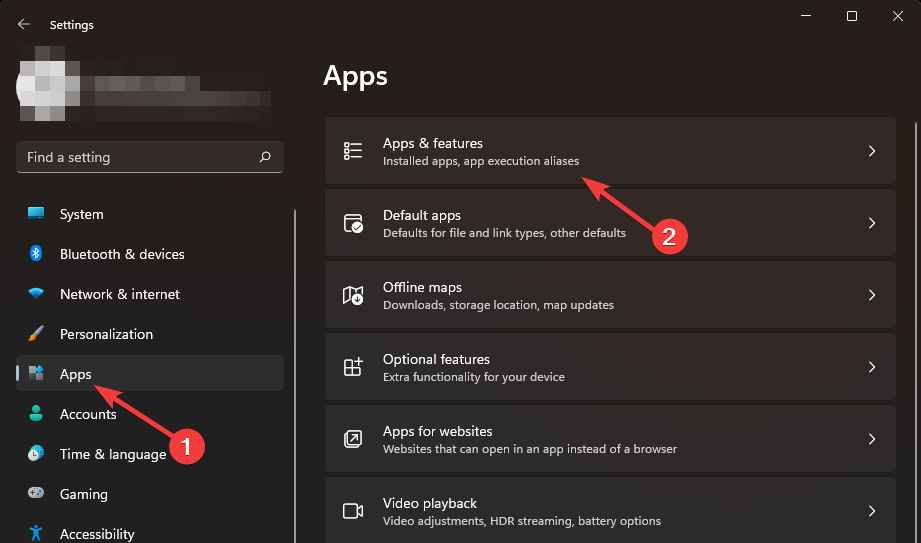
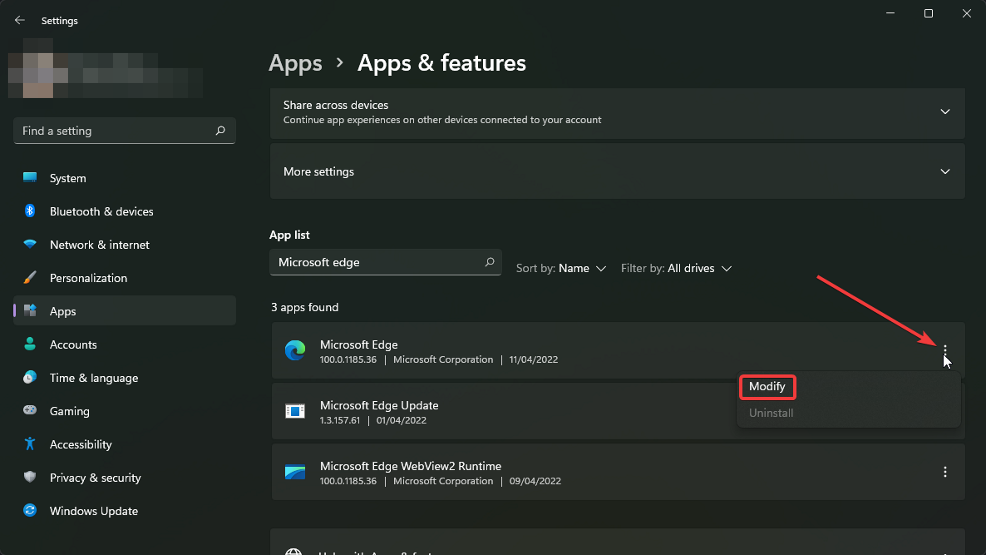
- Click on the Start Menu icon and open Settings.
- Select Apps, then Apps & features.
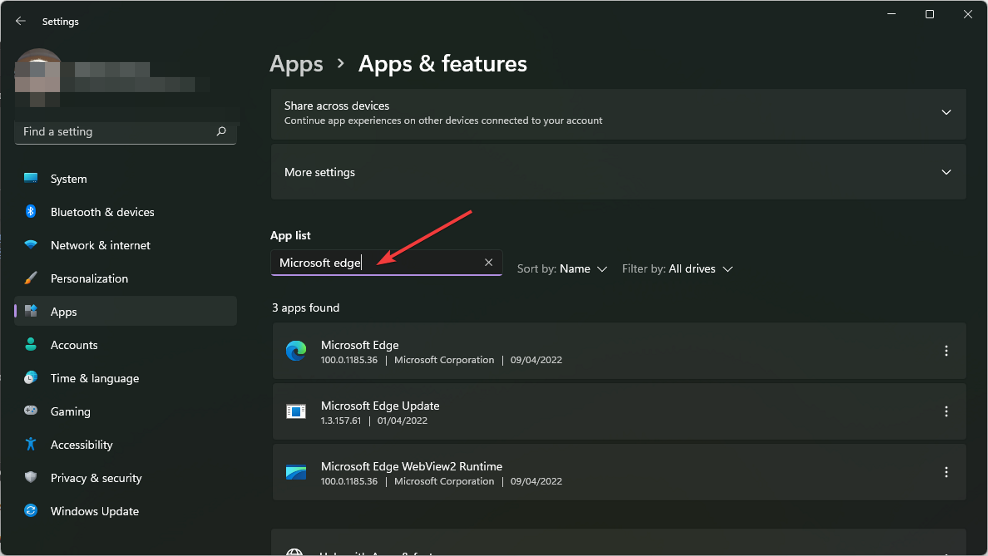
- Under App list, search Microsoft Edge.
- Click on the three dots next to Microsoft Edge and select Modify.
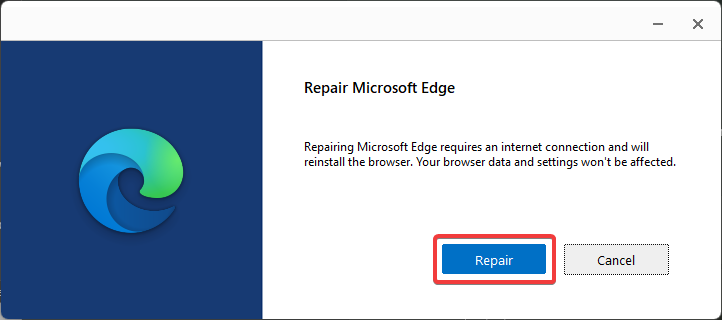
- Select Repair.
5. Reset Microsoft Edge
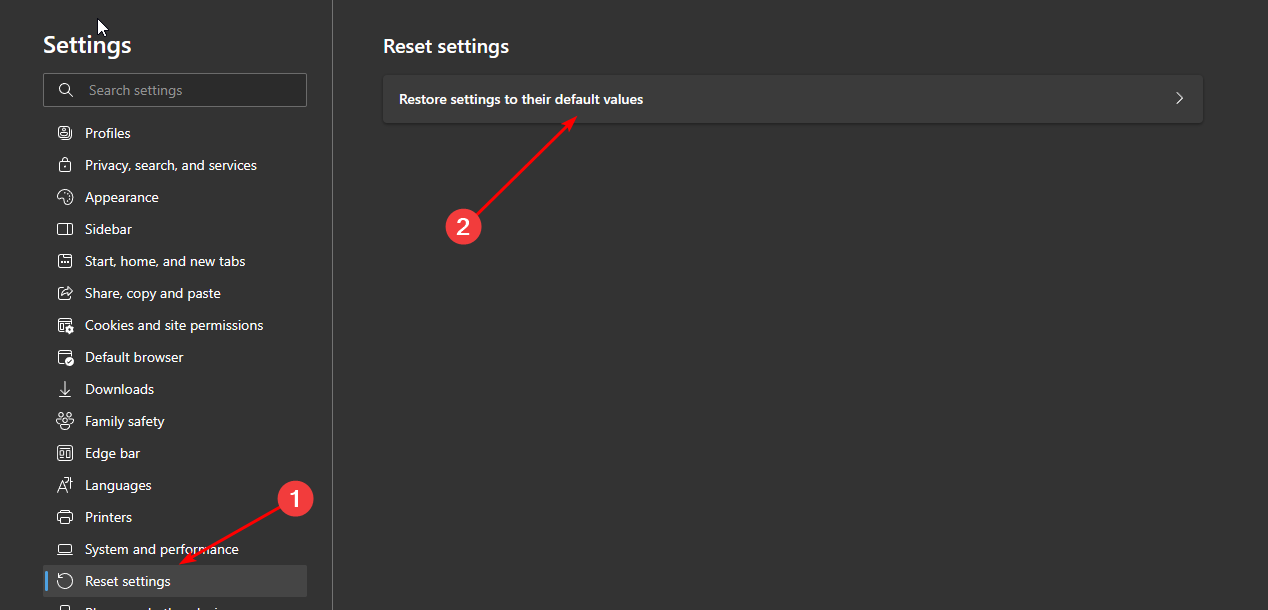
- Open Microsoft Edge and click on the three horizontal ellipses at the top right corner.
- Click on Settings.
- Select Reset settings and hit Restore settings to their default values.
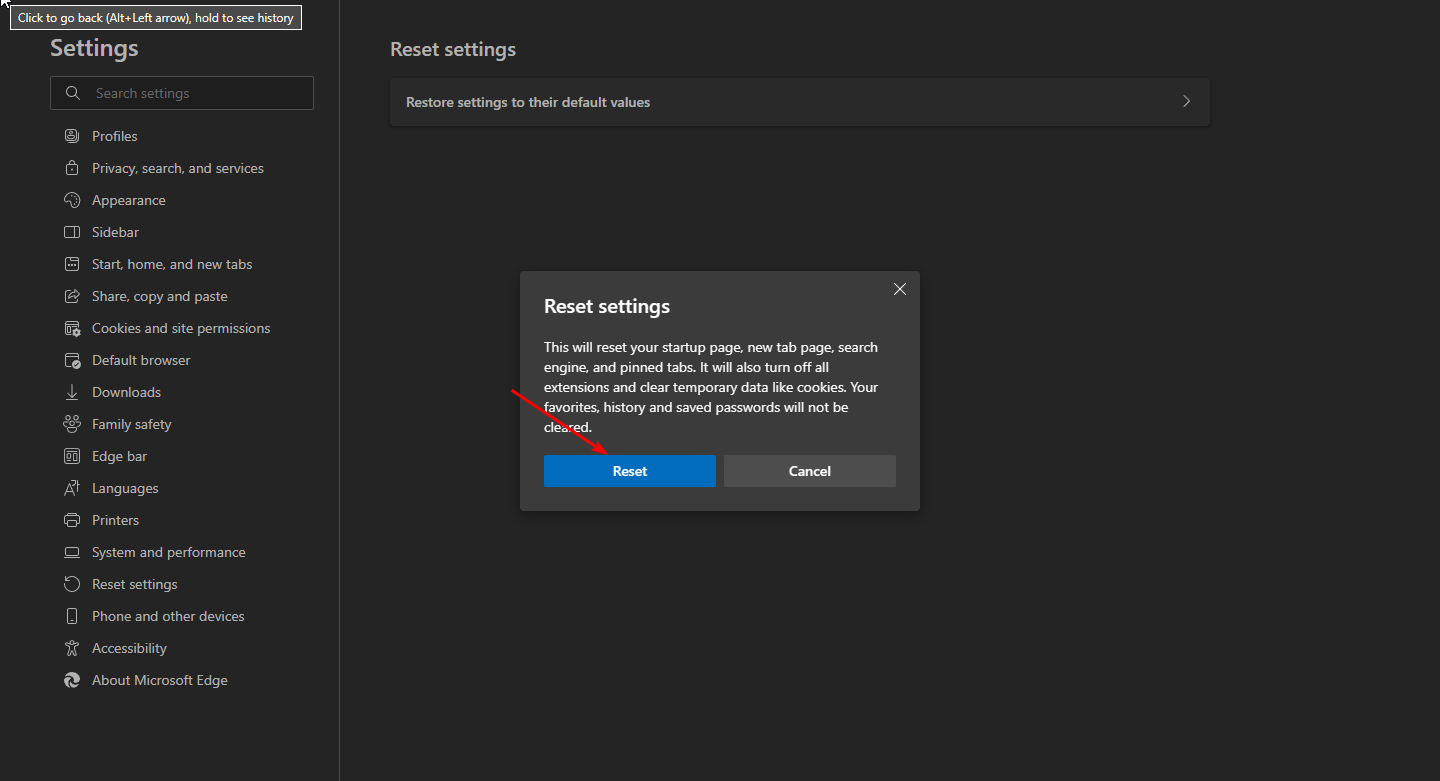
- Confirm Reset in the dialog box that appears.
6. Reinstall Microsoft Edge
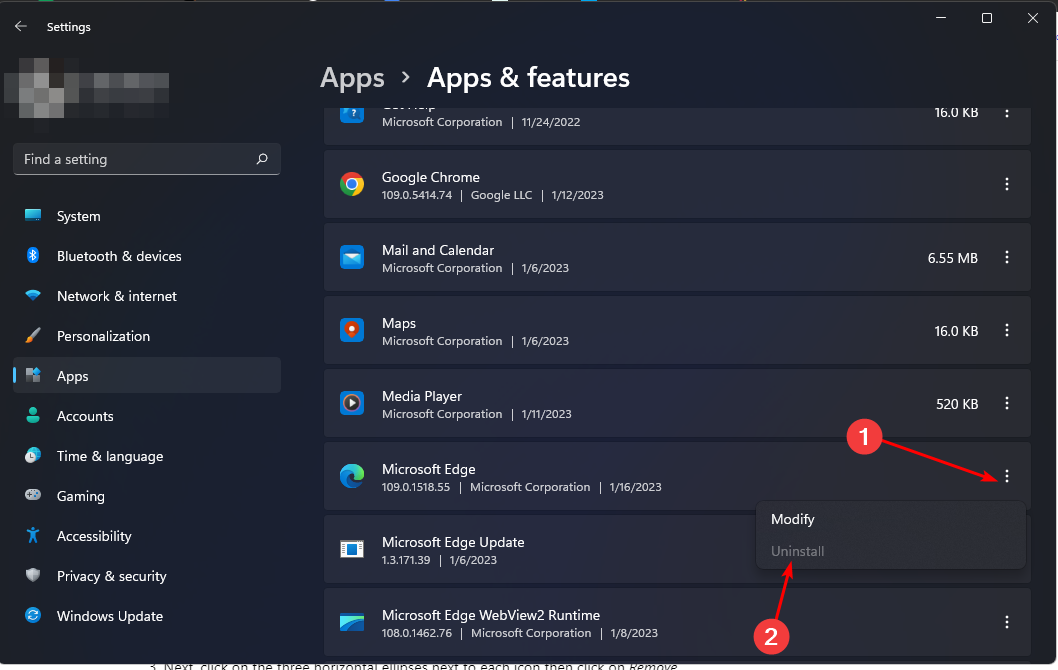
- Hit the Windows key and select Settings.
- Click on Apps on the left pane then select Apps & features.
- Locate Microsoft Edge, click on the three ellipses, and select Uninstall.
- Confirm Uninstall in the dialog box that pops up.
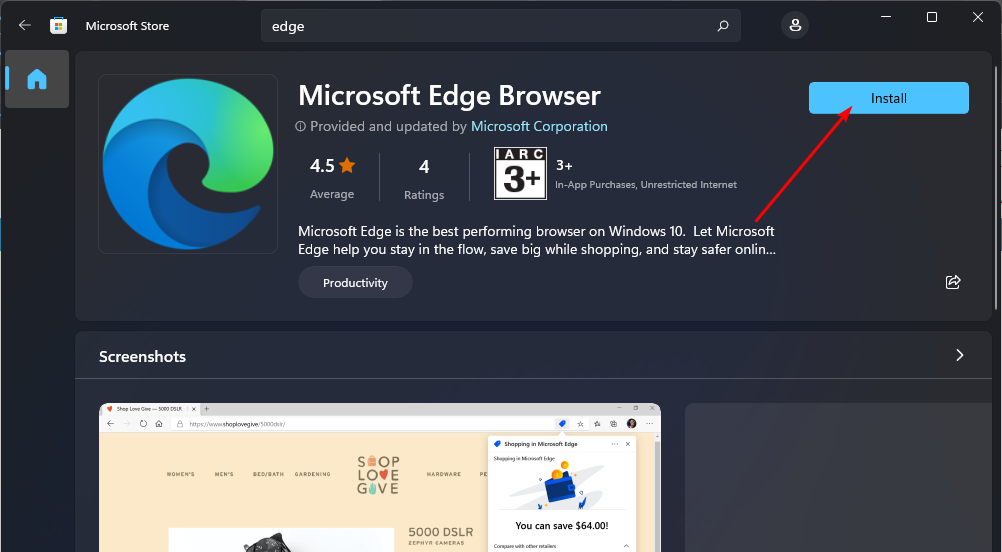
- Now go to the Microsoft Store, search for Microsoft Edge and click Install.
If you’re still having trouble with a specific page after examining the above troubleshooting guide, your network or proxy likely is to blame. You can try with another connection and see if there are any changes.
If so, get in touch with your network administrator for further assistance. However, we recommend you enable insecure content blocking so that your browser can flag off untrusted sites.
This, too, can get annoying with the constant warning pop-ups, so another workaround is to remove the warning alerts.
So there you have it. Here are a few effective workarounds to get you by. Let us know which solution worked out for you in the comment section below.


