3 Ways to Download & Install Epson L3210 Driver in Windows 11
Use the built-in methods or get from the official website
4 min. read
Updated on
Read the affiliate disclosure page to find out how can you help Windows Report effortlessly and without spending any money. Read more
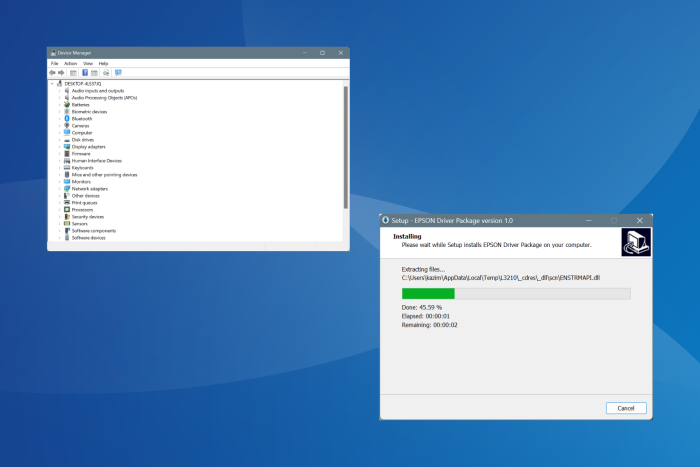
Epson recently released a Windows 11-compatible driver for their L3210 printer series. Until then, you had to download the drivers for Windows 10 (64-bit) and then install them.
While those for the previous iteration worked fine, you should download OS-compatible drivers from now on to minimize any conflicts and get the best performance.
Before you proceed, make sure to connect the printer to the PC, preferably through a wired connection.
How can I install the Epson L3210 printer driver in Windows 11?
1. Automatically through the setup
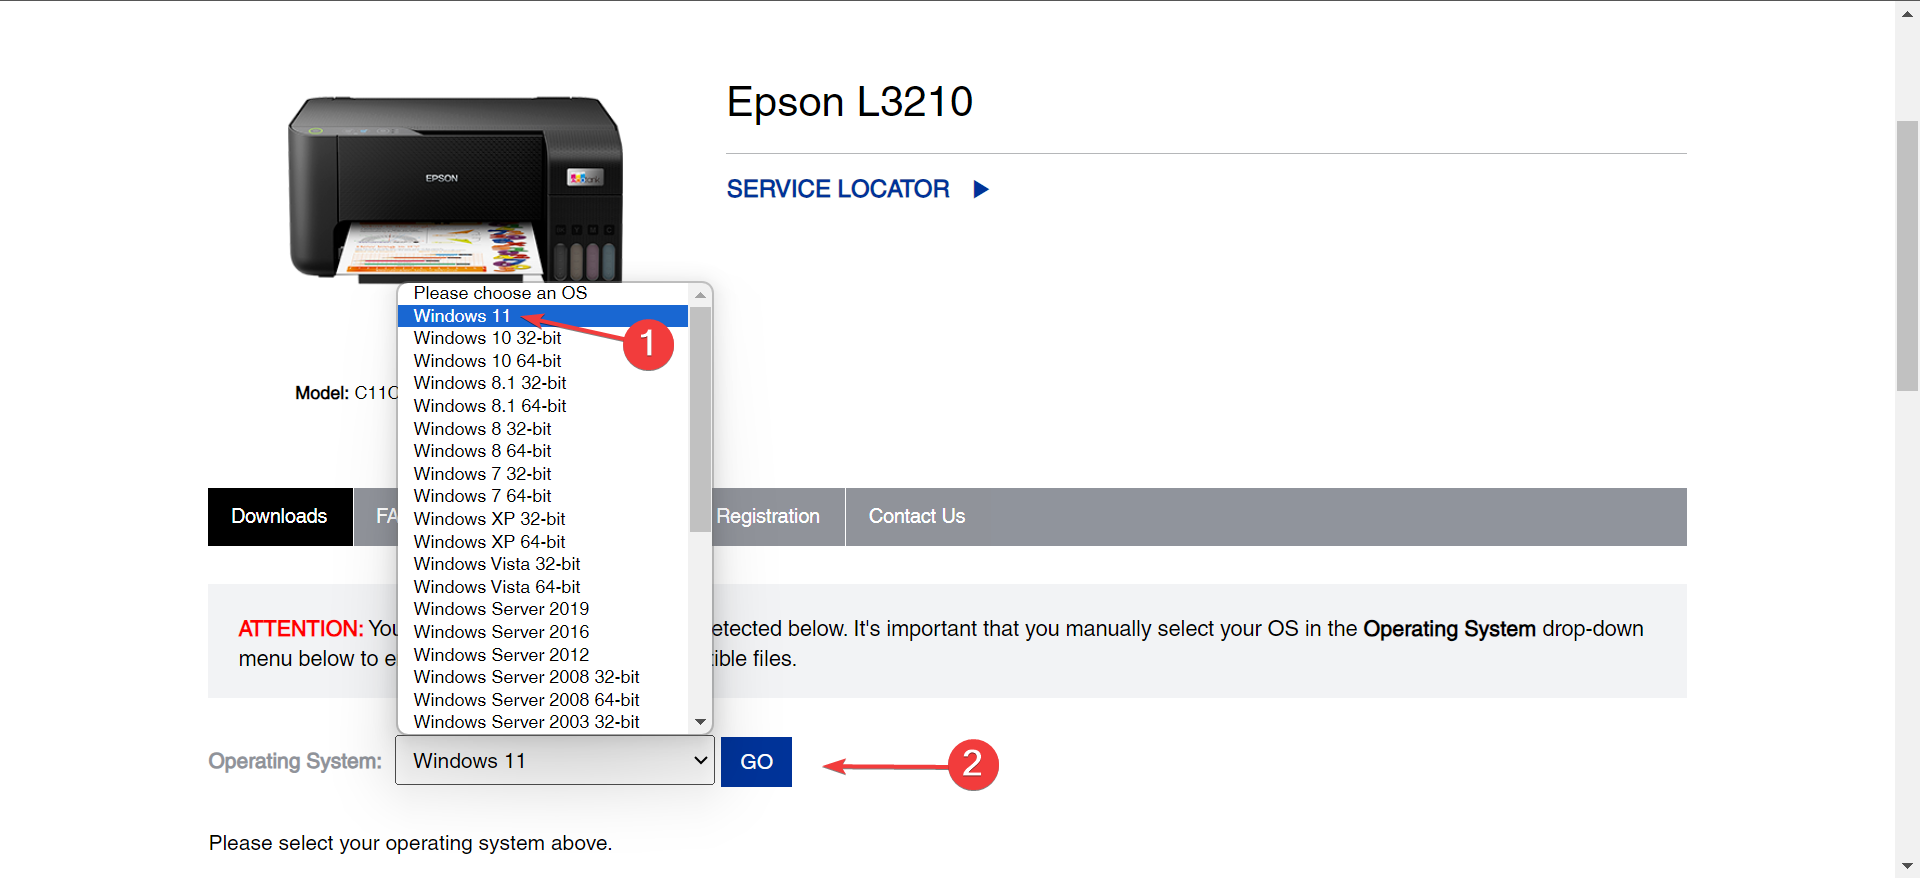
- Go to Epson L3210’s driver page, select Windows 11 from the Operating System dropdown menu, and click on Go.
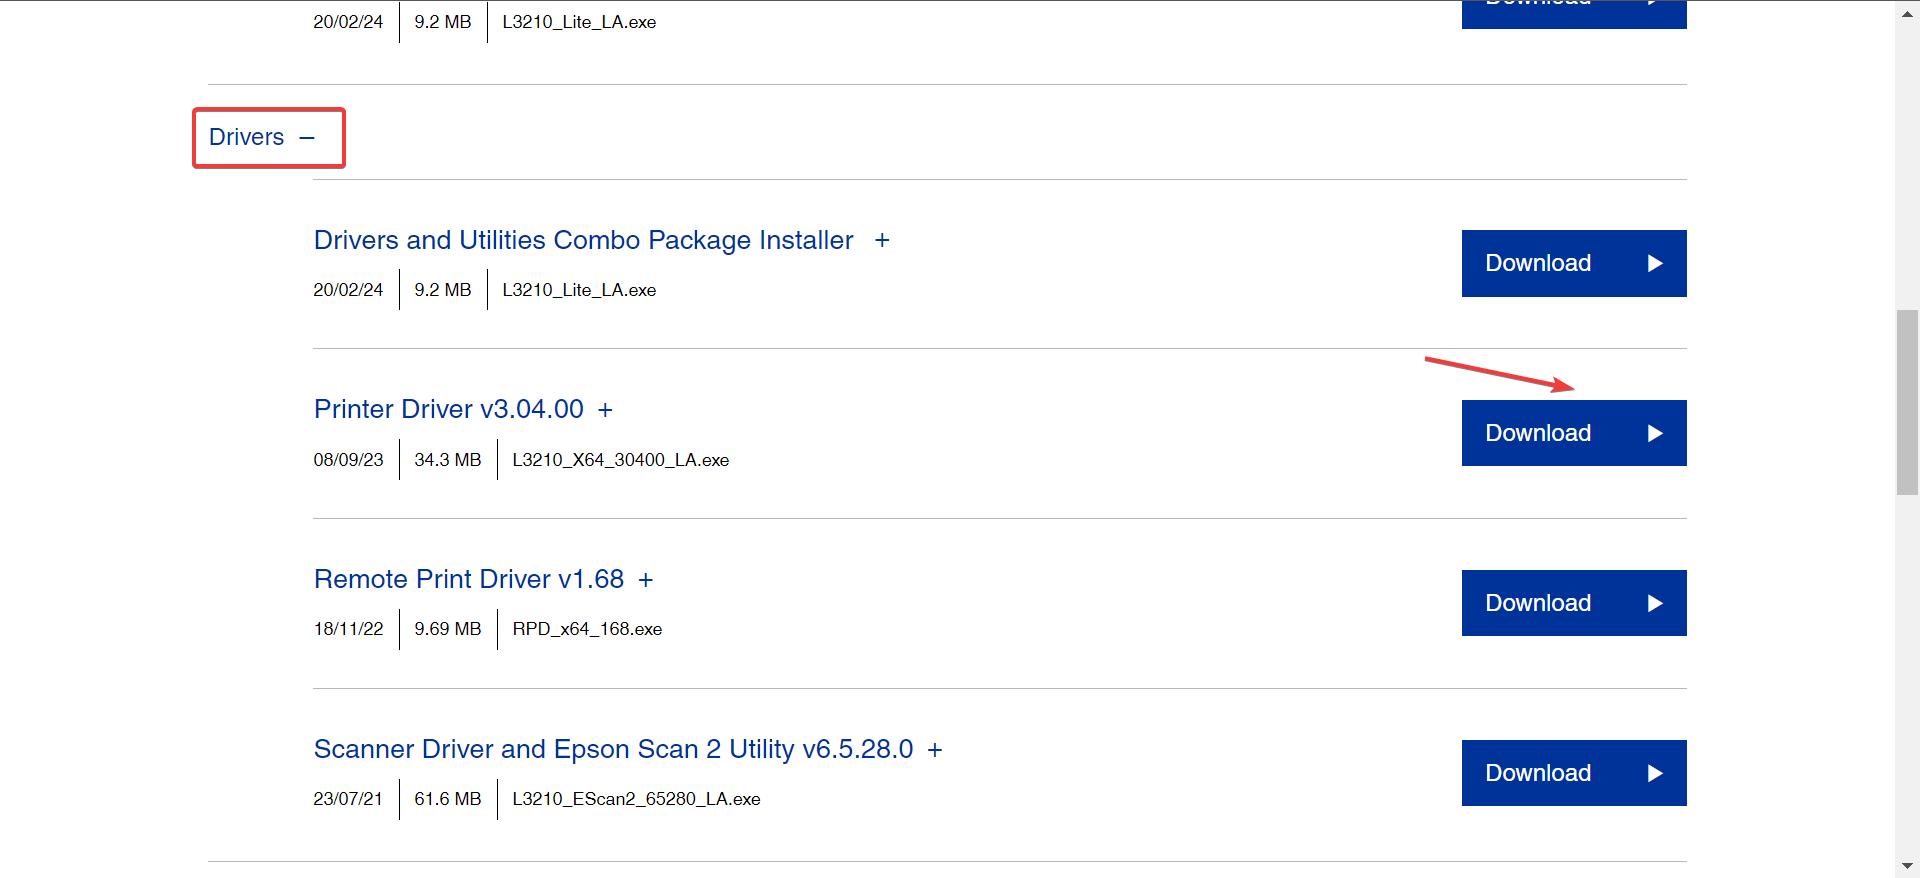
- Now, expand the Drivers entry, and click the Download button next to Printer Driver.
- Once downloaded, head to its storage location, and double-click on the L3210_X64_30400_LA.exe file to run the setup.
- Click Yes in the UAC prompt.
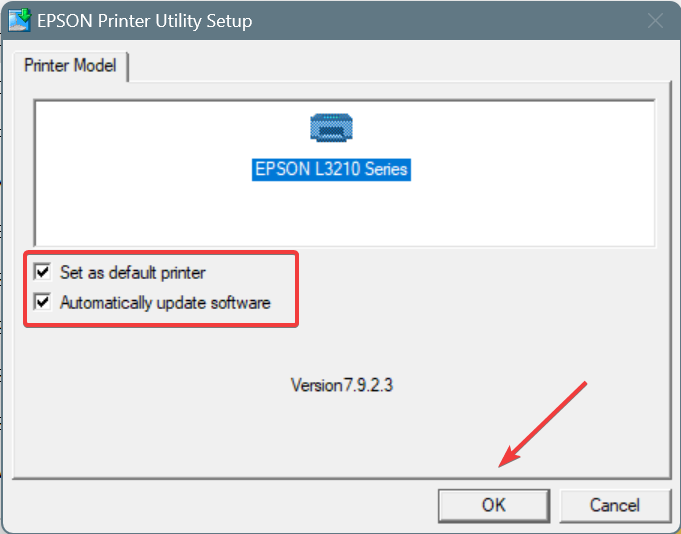
- Tick/untick the Set as default printer and Automatically update software options as required, and click on OK.
- Select the language from the dropdown menu, preferably English, and click OK.
- Agree to the terms of the license agreement.
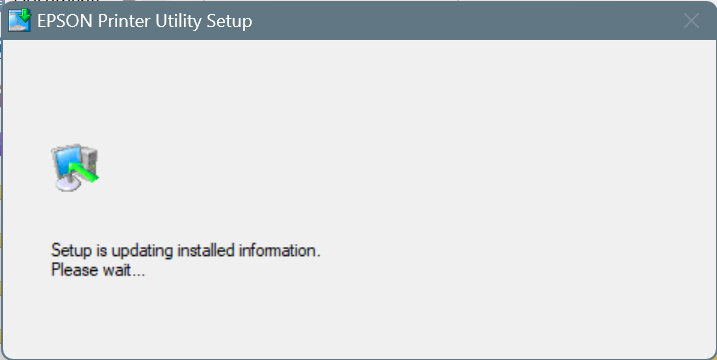
- Now, let the setup install the latest Epson L3201 series printer driver.
- Once done with the printer driver installation, restart the PC for the changes to apply.
Similarly, you can install the Epson L3210 scanner driver in Windows 11. The process remains the same. You will have to download the scanner drivers from the website instead.
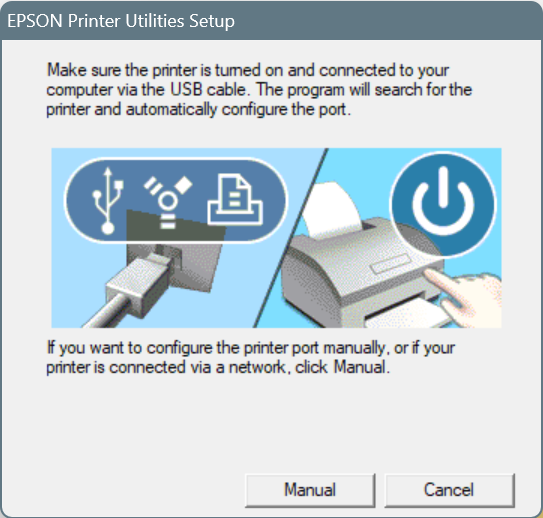
Also, if you see the Make sure the printer is turned on and connected to your computer via the USB cable message, even when the printer is powered on and plugged in, we will need to manually set it up as described next.
2. Manually through the setup
3.1 Extracting the driver files
- Download the Epson L3210 driver from the official website.
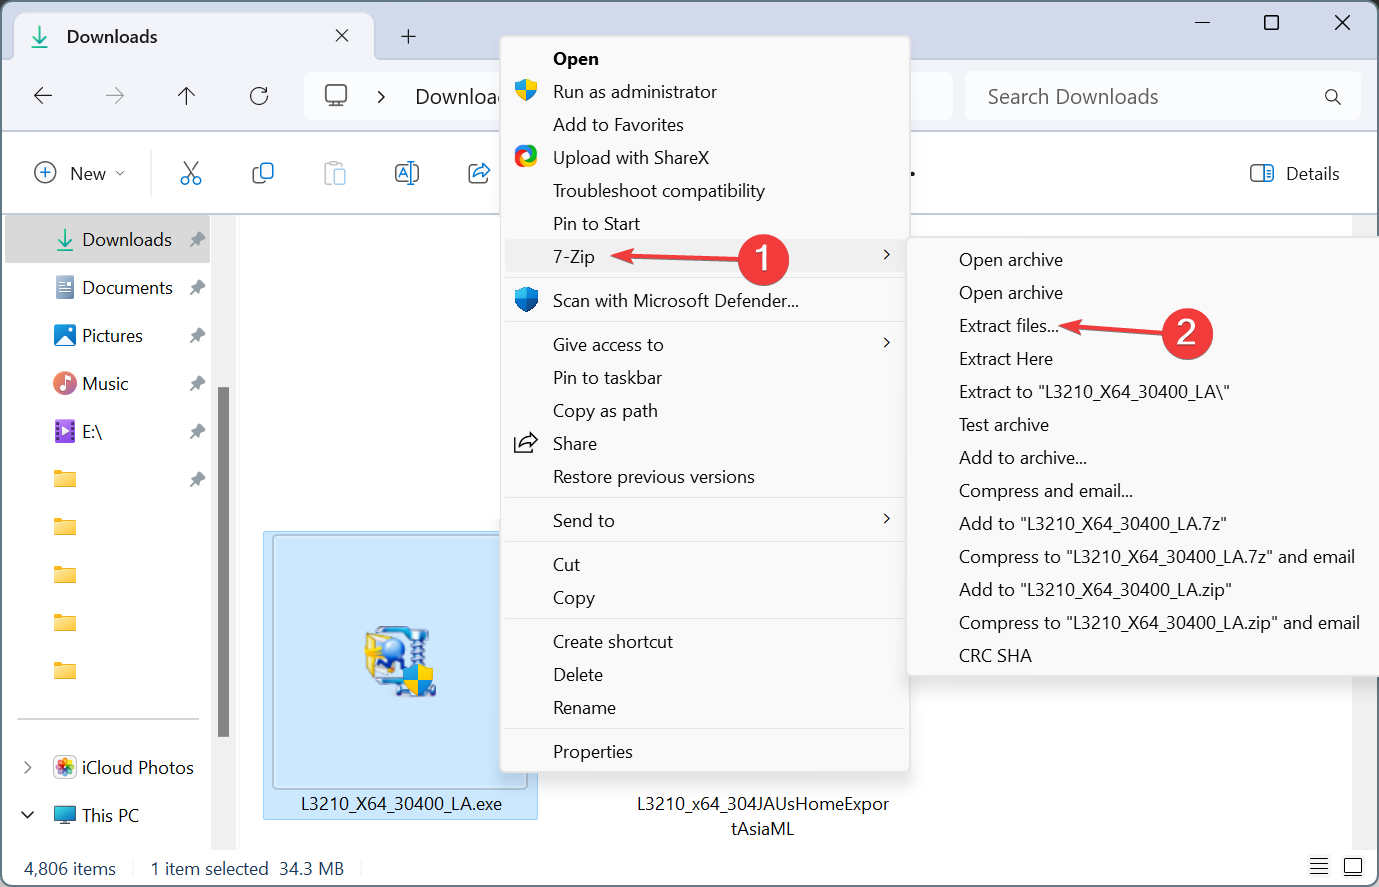
- Right-click on the downloaded L3210_X64_30400_LA file, choose Show more options, pick the installed file extraction software, and select Extract files from the context menu.
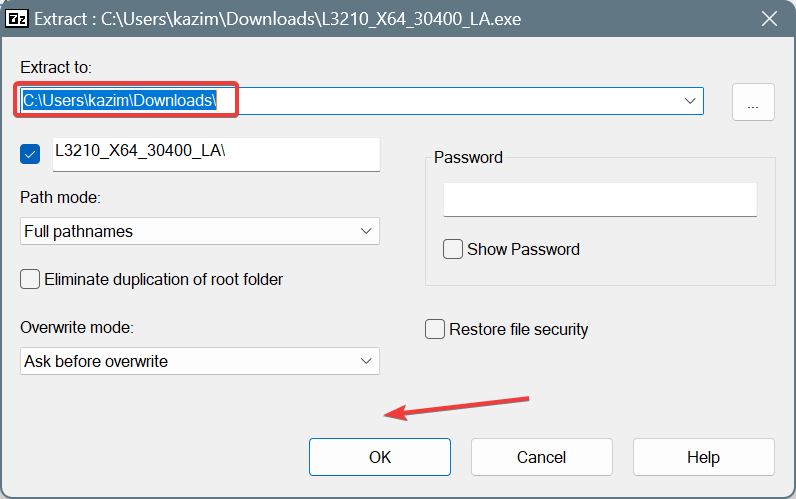
- Choose the extract location and click on OK. We didn’t change it and extracted the files in the same folder as the .exe.
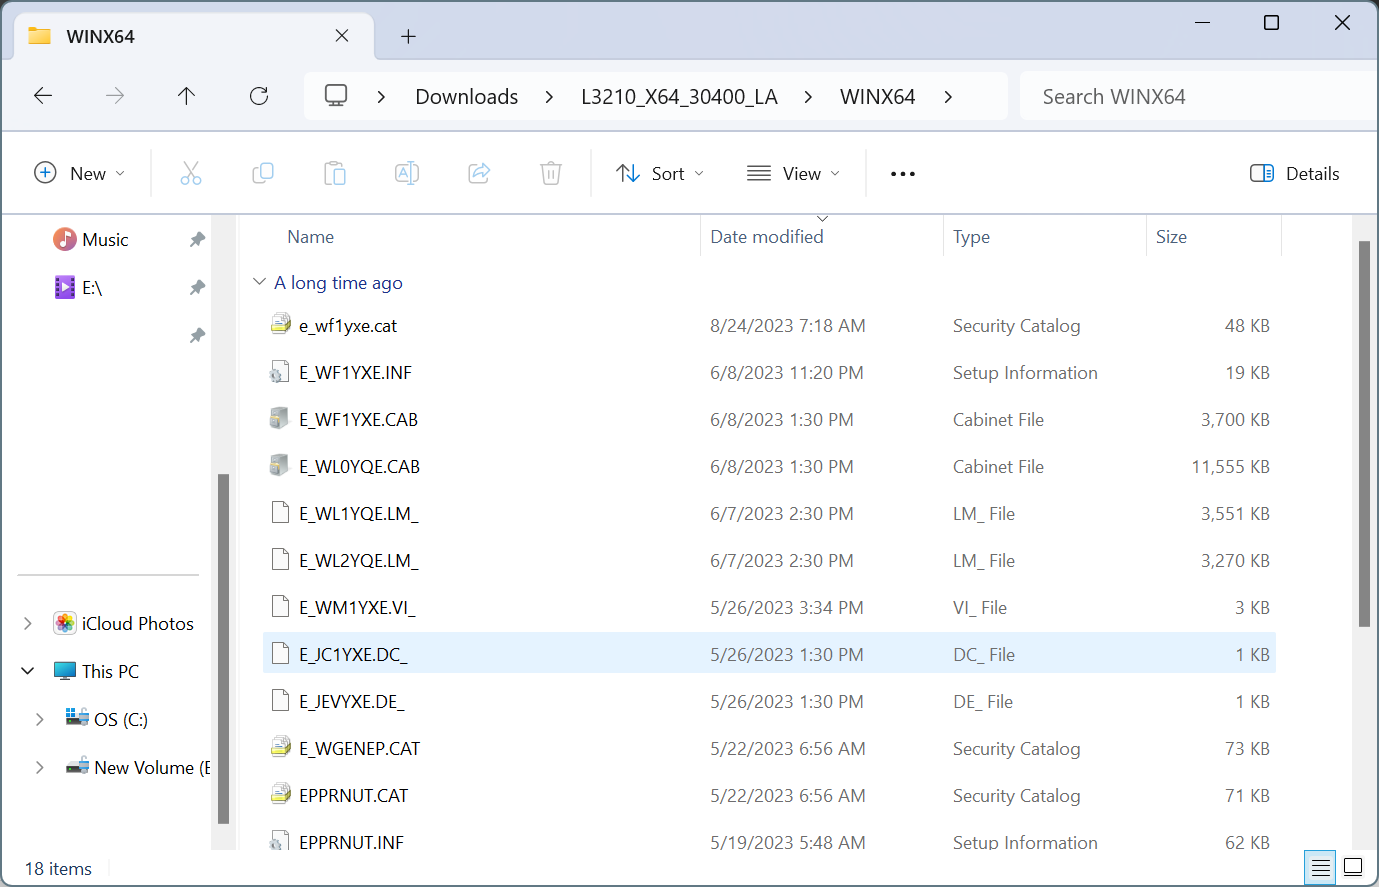
- Finally, verify that all the files have successfully been extracted.
3.2 Installing the driver
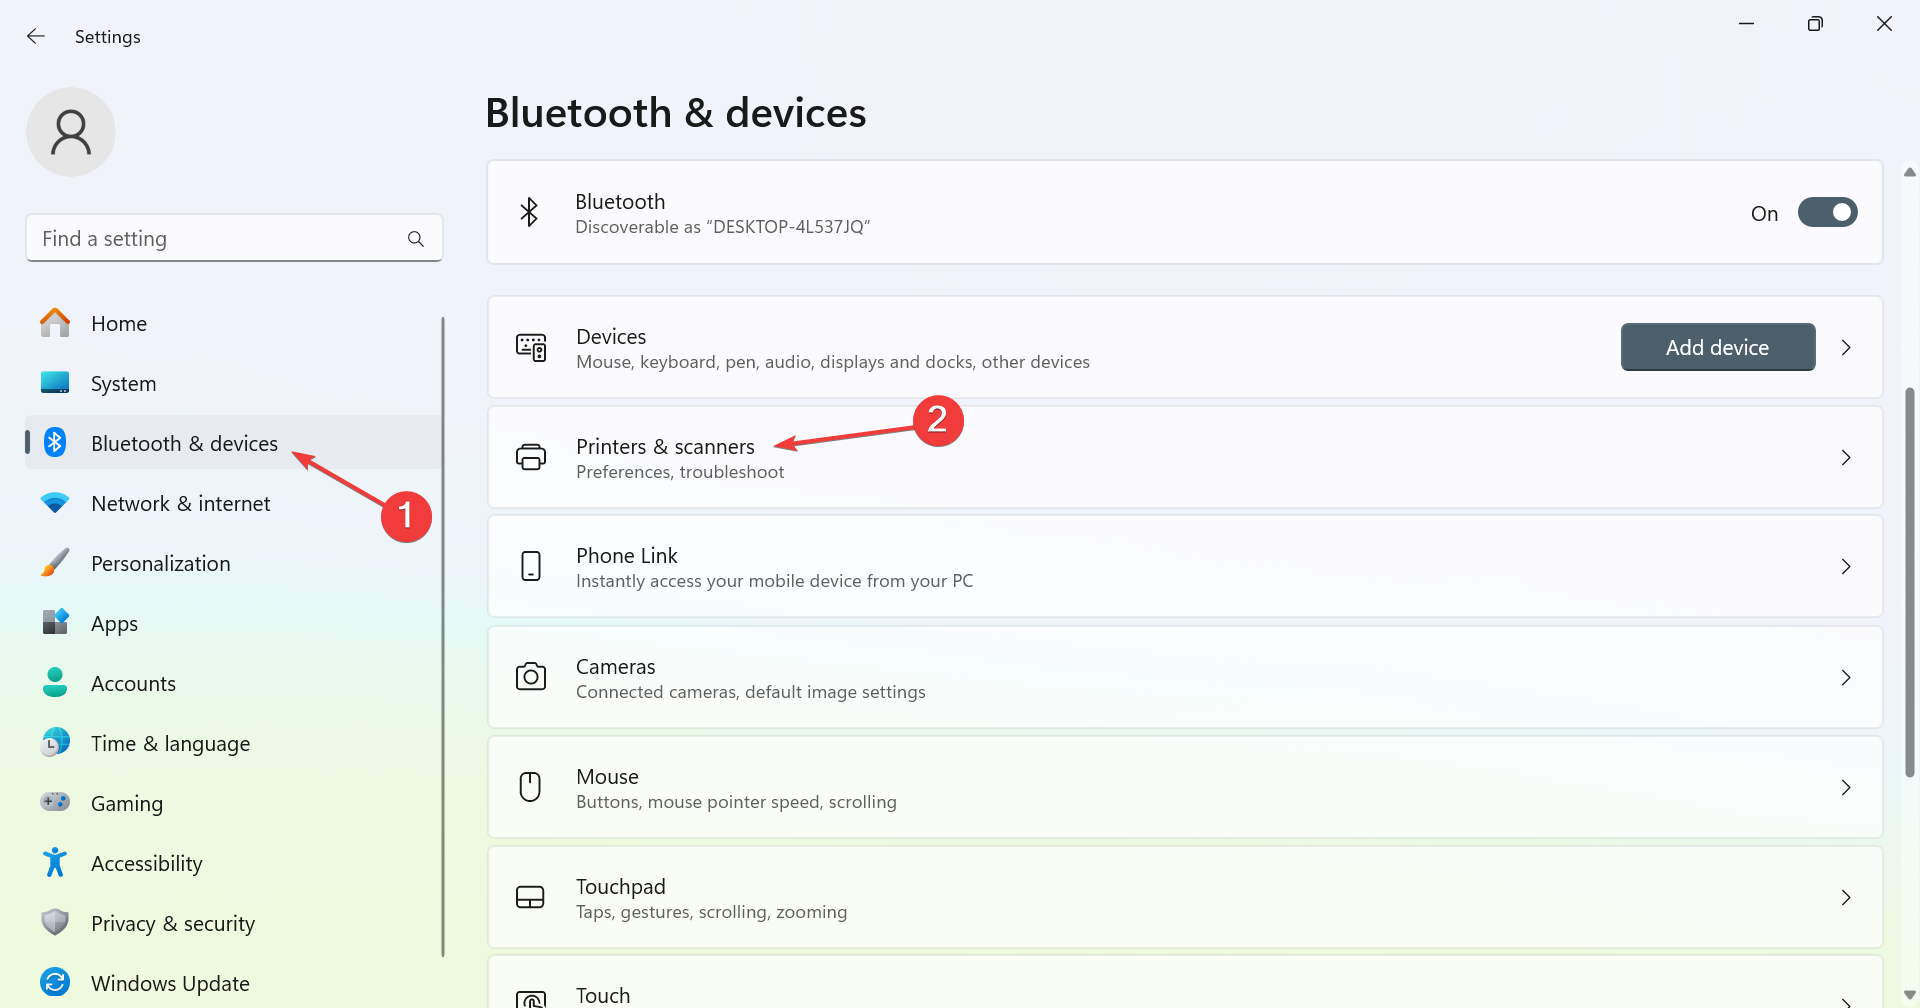
- Press Windows + I to open Settings, go to Bluetooth & devices from the navigation pane, and click on Printers & scanners.
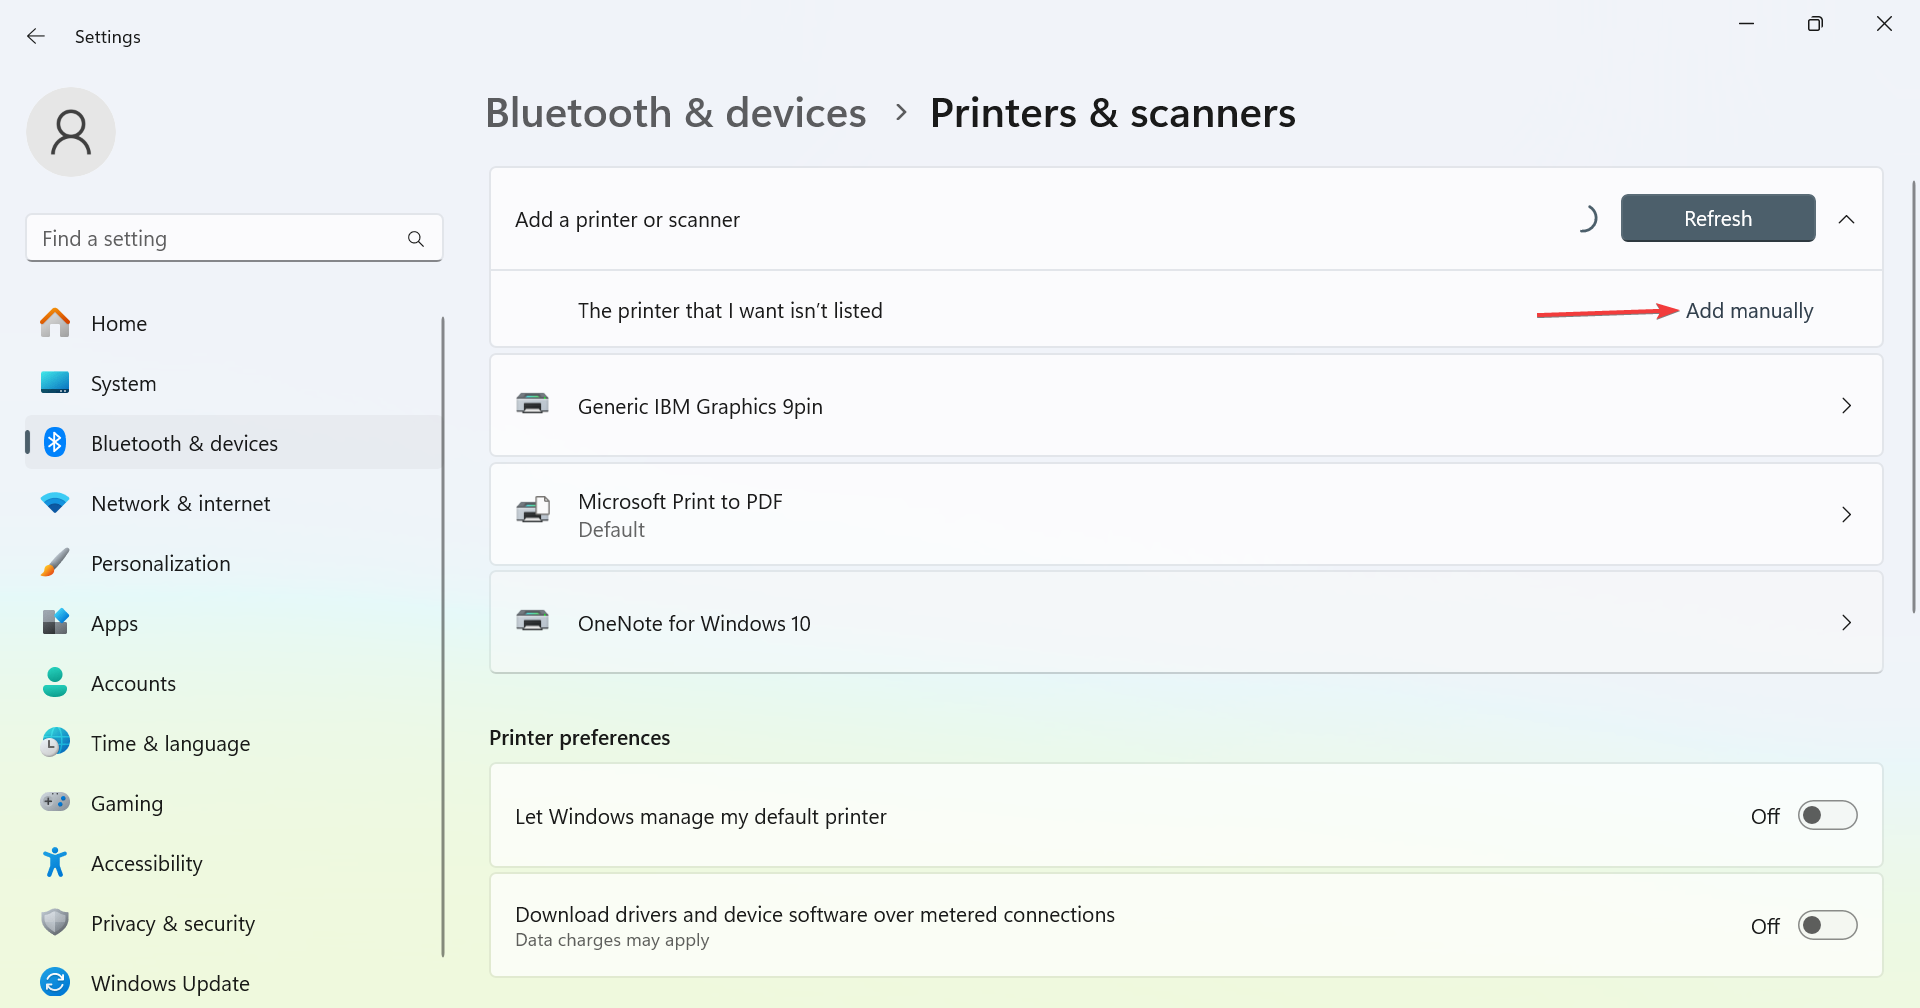
- Click the Add device button near the top right.
- When you see The printer that I want isn’t listed appear, click on Add manually next to it.
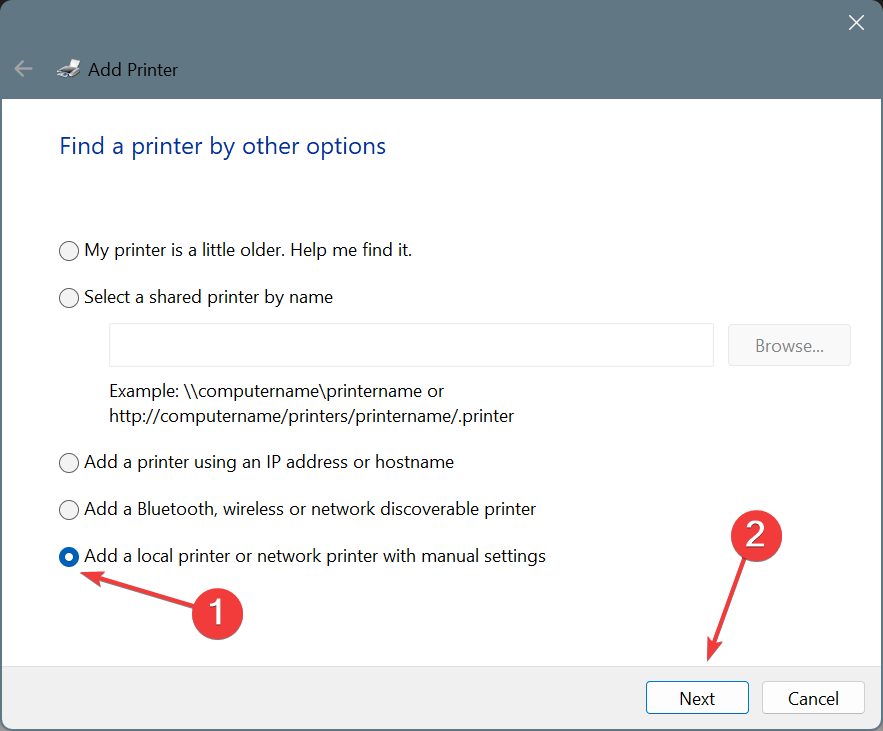
- Choose Add a local printer or network printer with manual settings and click Next.
- Now, choose Use an existing port, pick USB_001 or any similar entry from the dropdown menu, and click Next.
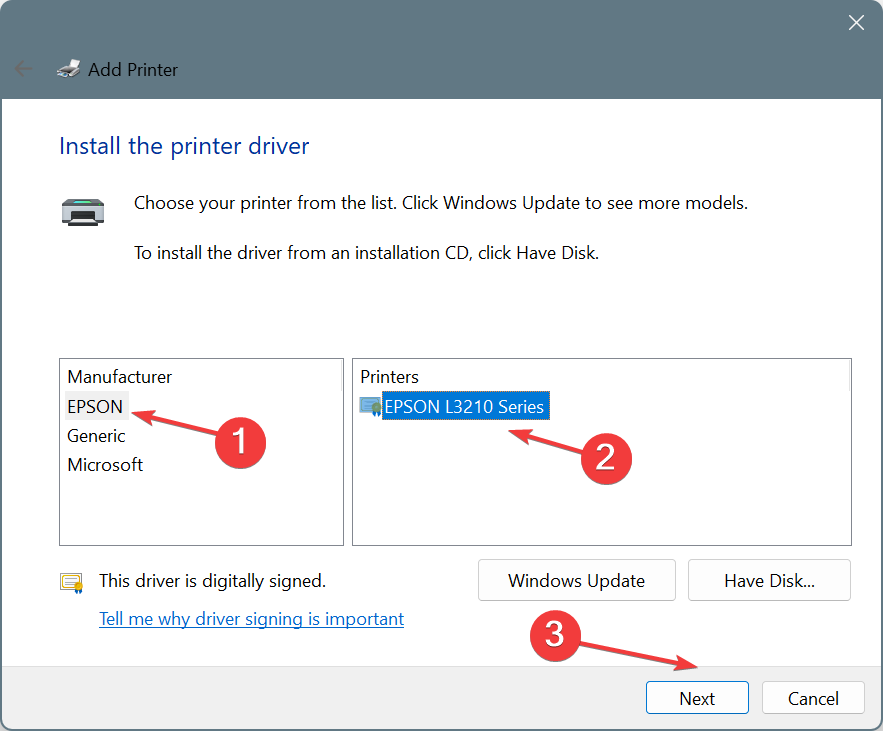
- Pick Epson from under the Manufacturer column, then select Epson L3210 Series, and click Next.
- If the Epson entry isn’t listed, click on Have disk, navigate to the location of the files you extracted earlier, open the WINX64 folder, choose a .inf file, click Open, and then proceed.
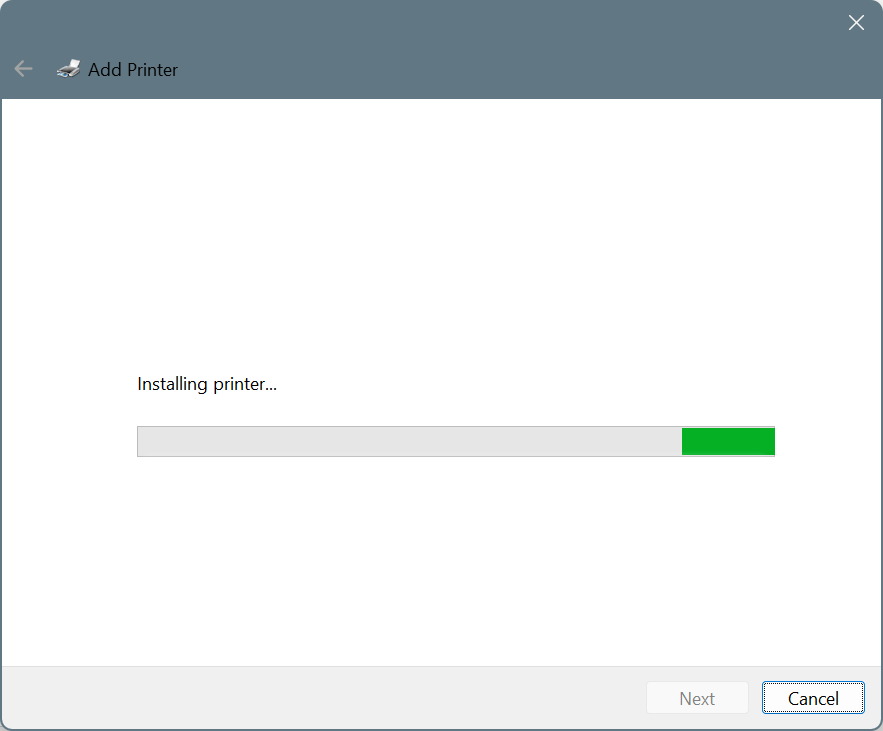
- Set a printer name, then wait for the installation to complete.
- Configure the preferred printer-sharing settings.
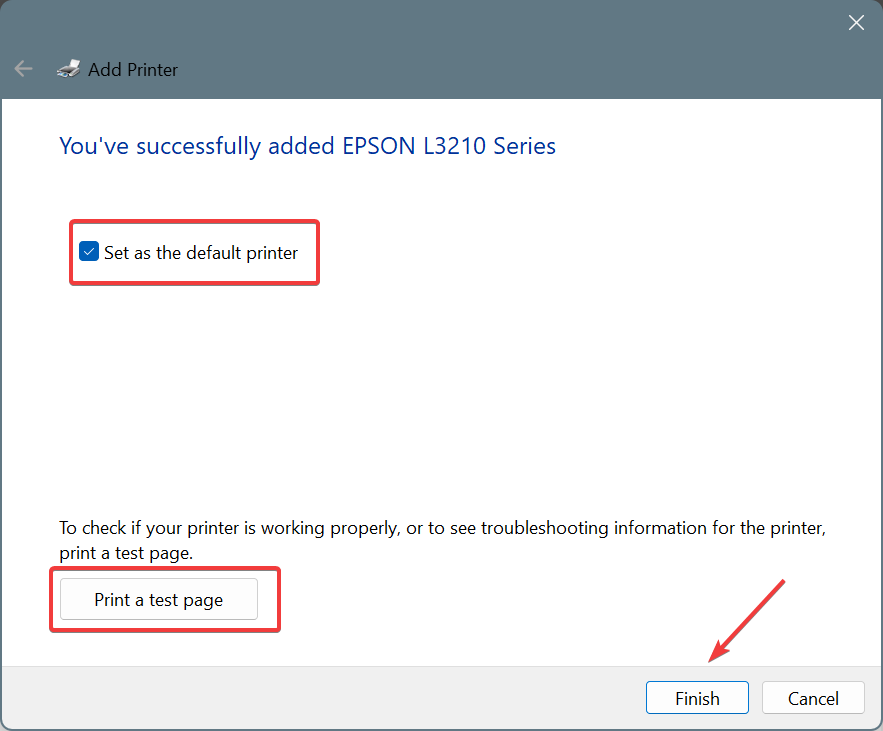
- If required, tick the checkbox for Set as the default printer and click on Print a test page, then click on Finish to complete the setup, and finally restart the computer.
You should now find Epson L3210 listed under the list of printers in the Windows 11 Settings and the Device Manager with the latest driver installed. And it shouldn’t, in all likelihood, throw any errors.
3. Install the driver via Device Manager
 Tip
Tip
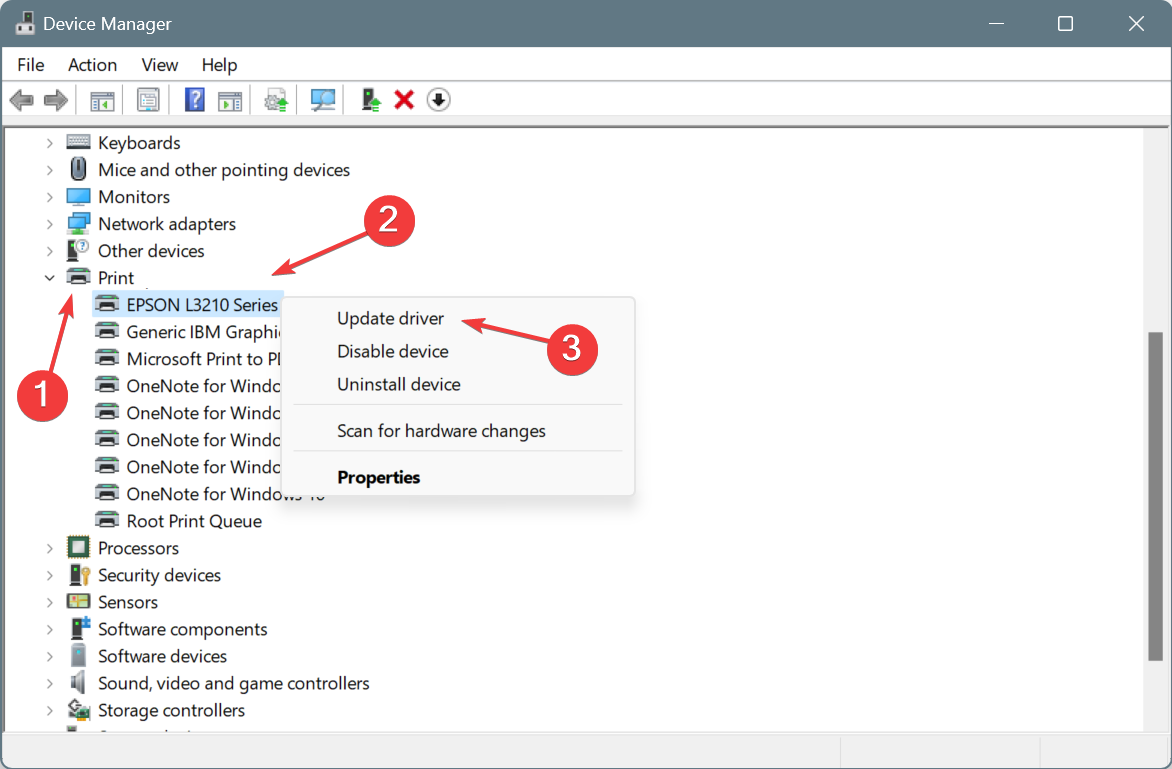
- Press Windows + X to open the Power User menu, and select Device Manager from the list.
- Expand the Printers entry, right-click on Epson L3210, and select Update driver.
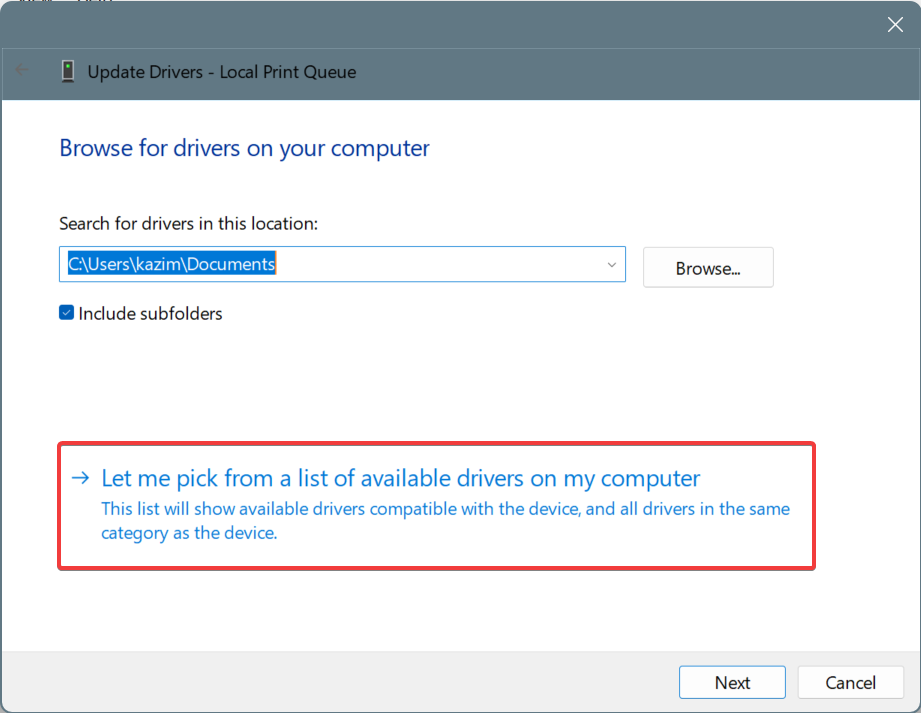
- Choose Browse my computer for drivers.
- Now, select Let me pick from a list of available drivers on my computer.
- Click on Have disk, navigate to the location where you have the extracted driver files (.inf), select it, and then proceed with the update.
If a newer version comes out later, you can simply update it via the Device Manager instead of having to install things from scratch. Make sure to verify compatibility or else the printer may stop working.
Remember, the process to install printer drivers in Windows 11 is similar across manufacturers. You just need to find the required setup files. After that, it’s pretty much what we discussed earlier!
For any queries or to share issues you faced with the driver or installation, drop a comment below.

